Using GitHub with VS Code
VS Code and GitHub
This guide will cover the basics of linking a VS Code project to a GitHub repository and pushing commits. Before beginning this tutorial, you’ll need to install Git on your computer (see this guide for instructions). You’ll also need to download and install Visual Studio Code.
The Setup
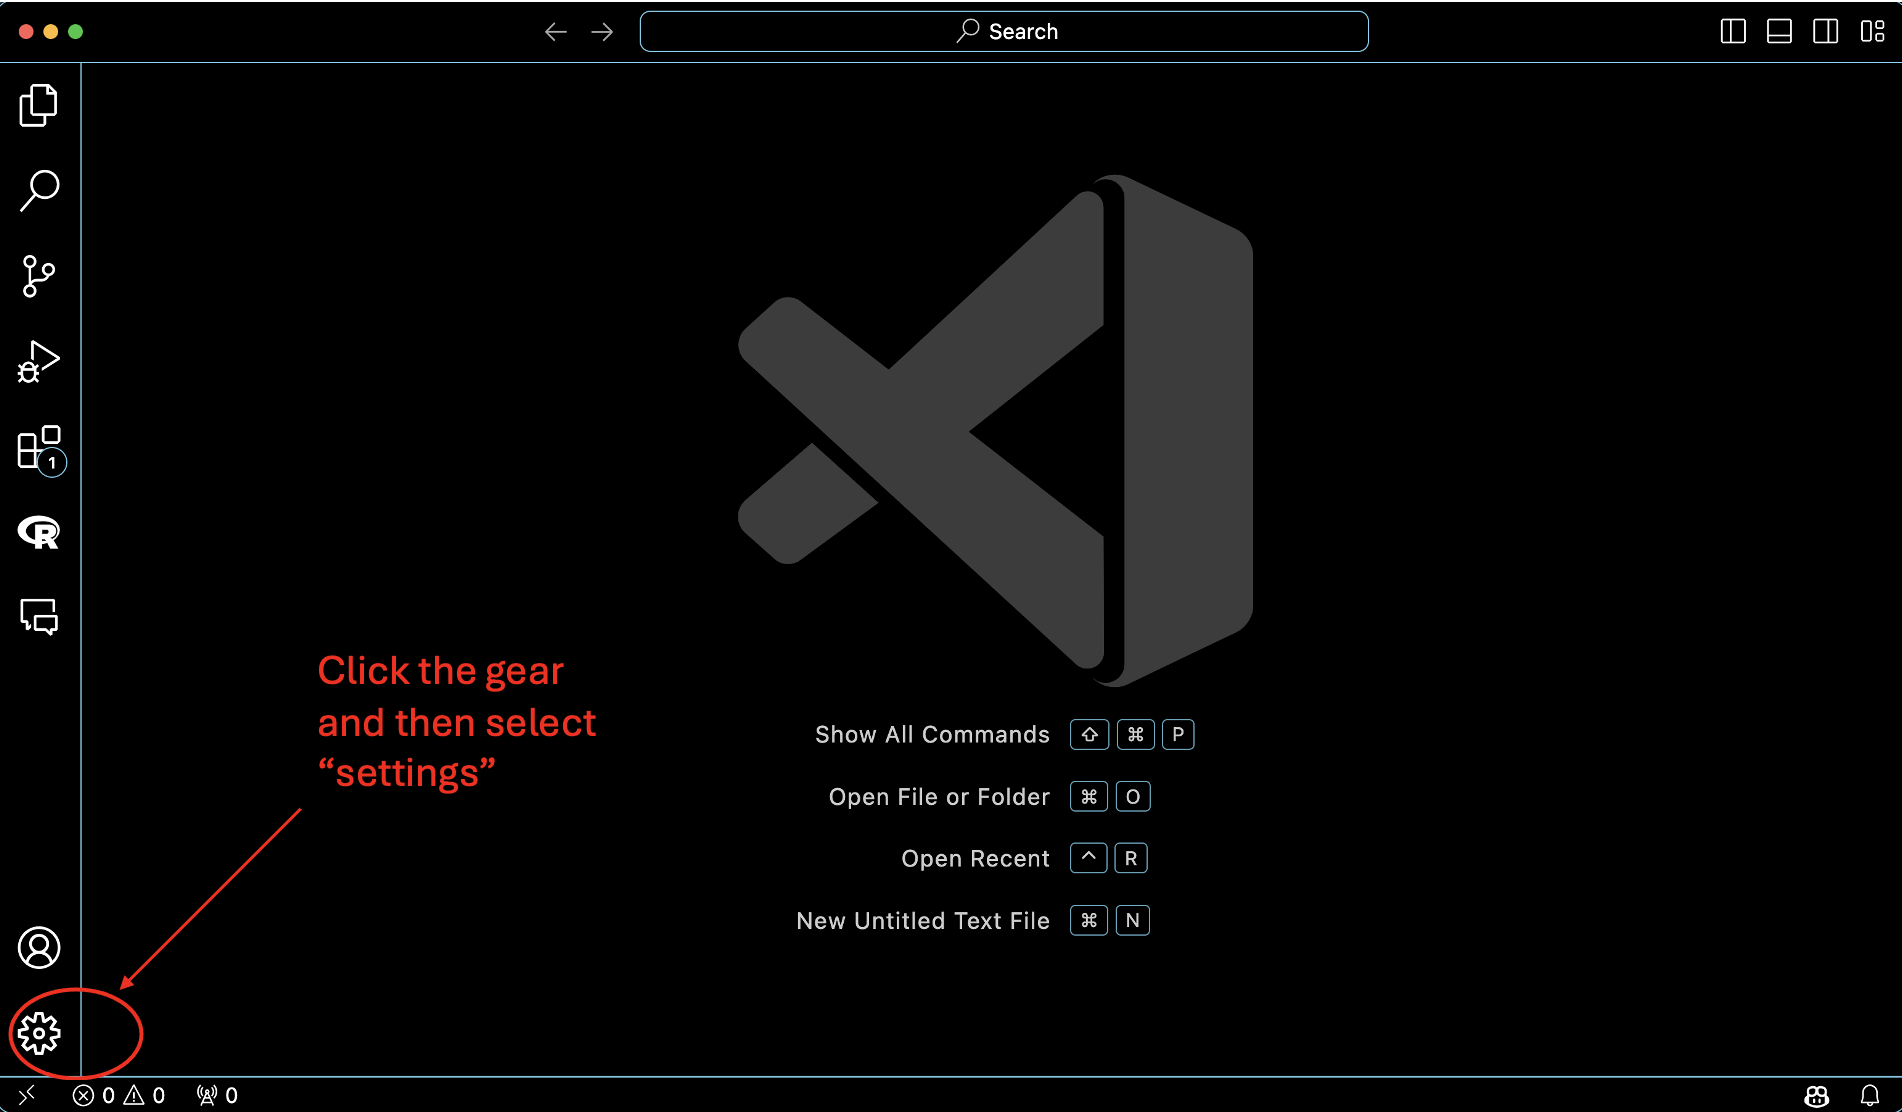
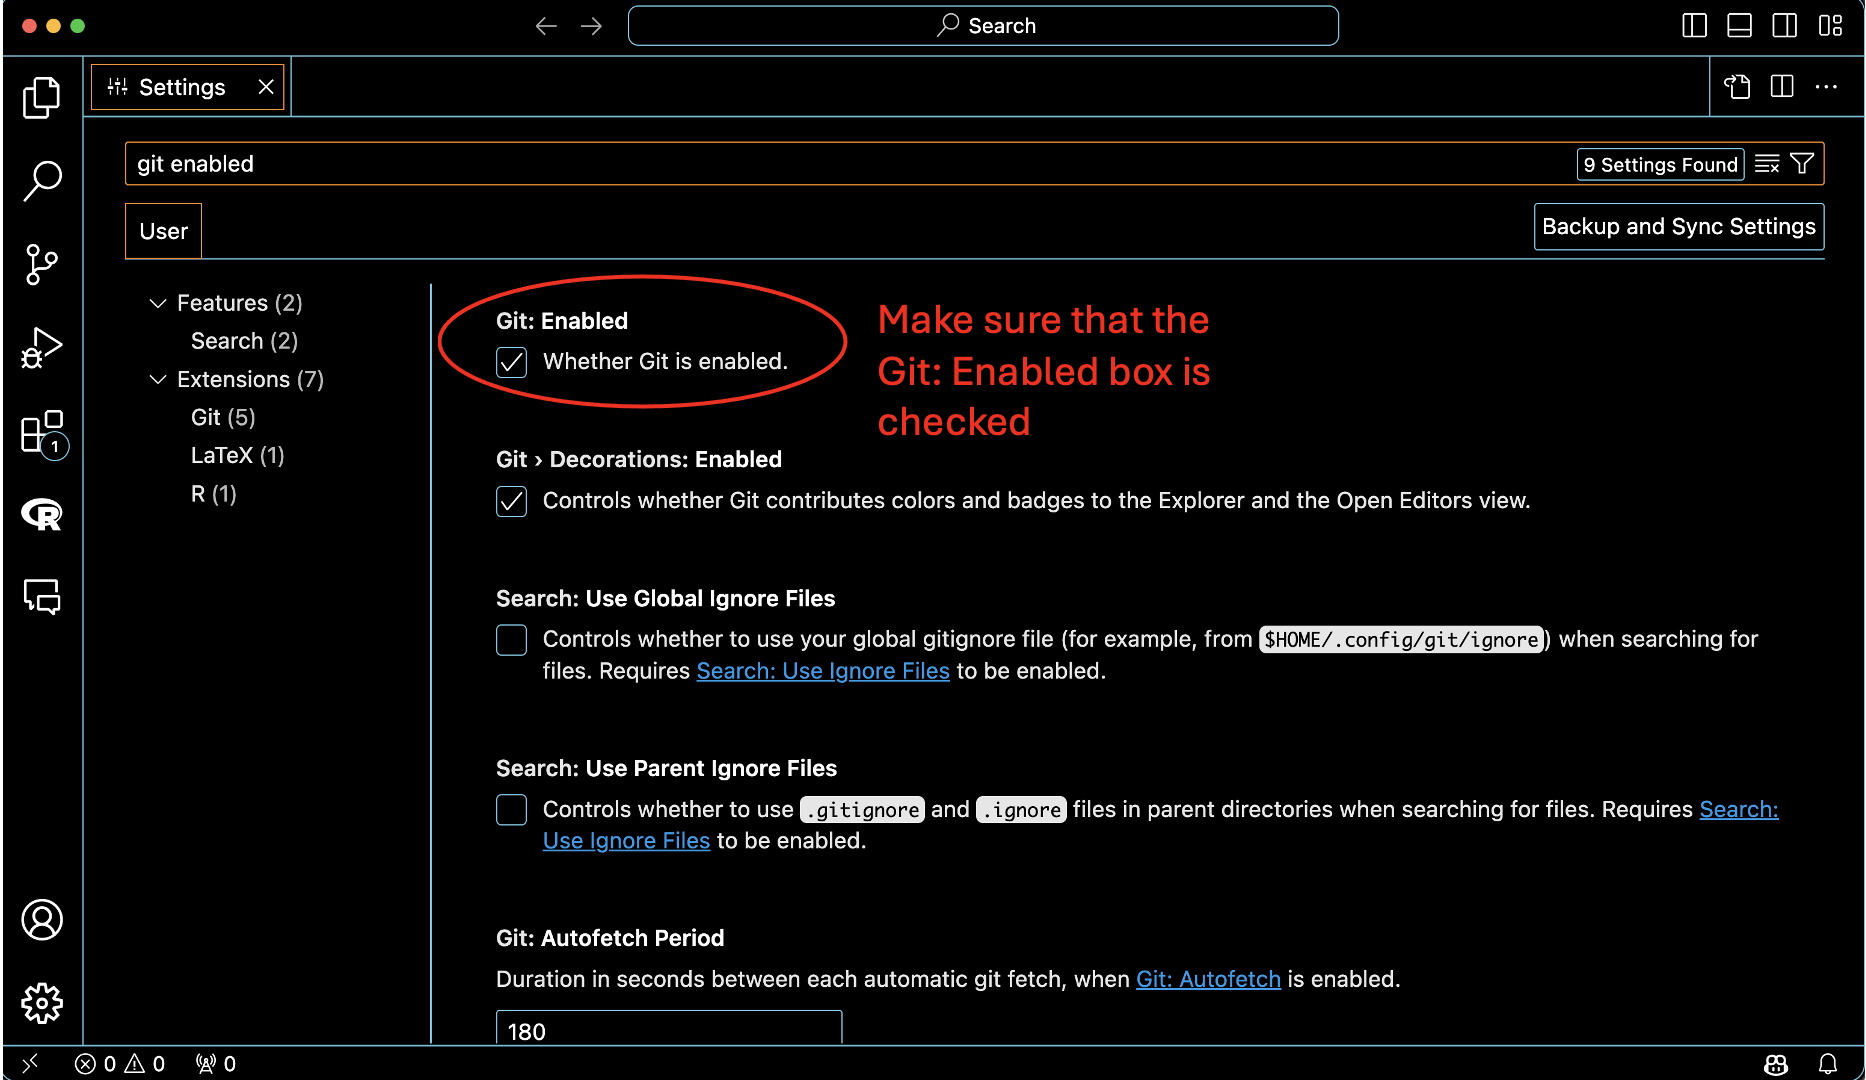
After installing the software on your computer, you’ll need to create a GitHub repo for your project. If this is your first time creating a GitHub repo, you can follow this guide. Next, open VS Code and make sure that Git is enabled in your settings as follows:
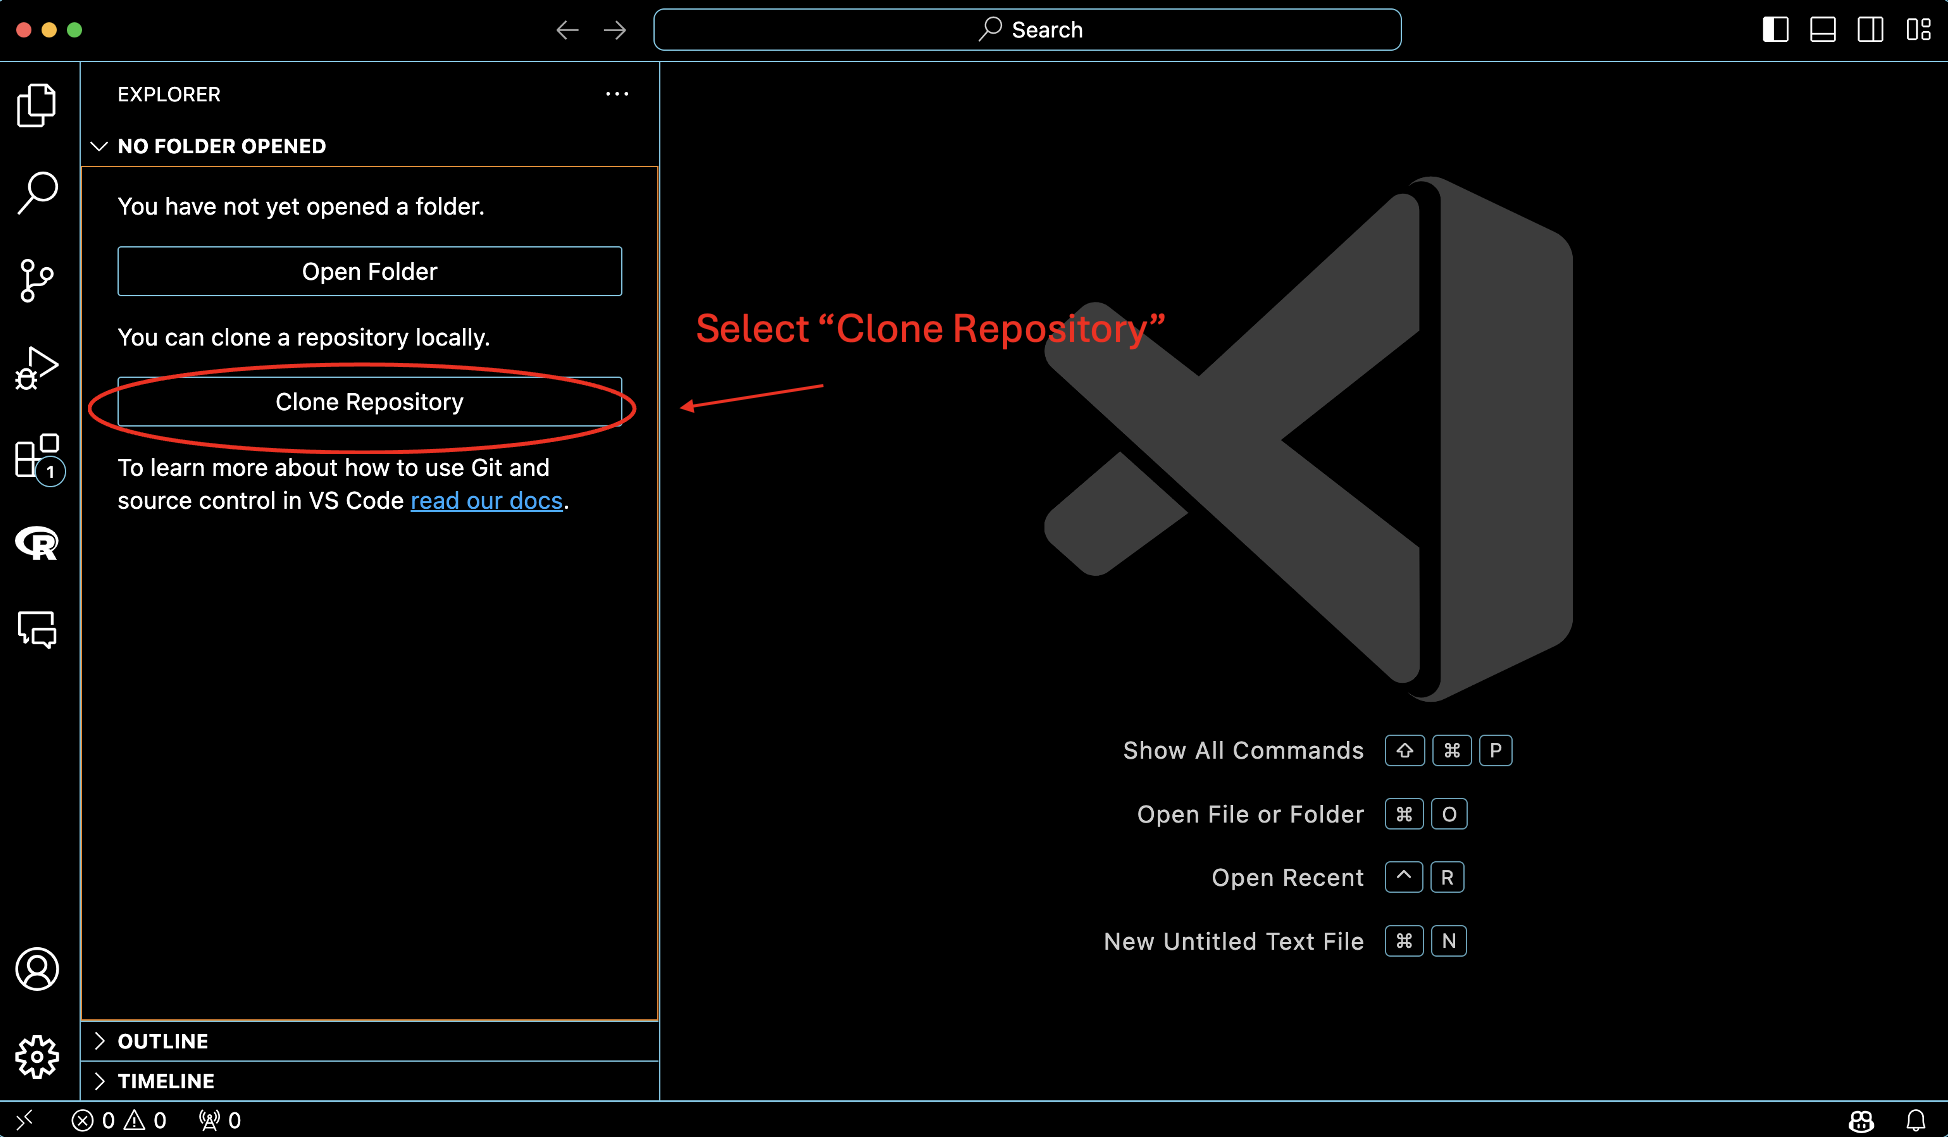
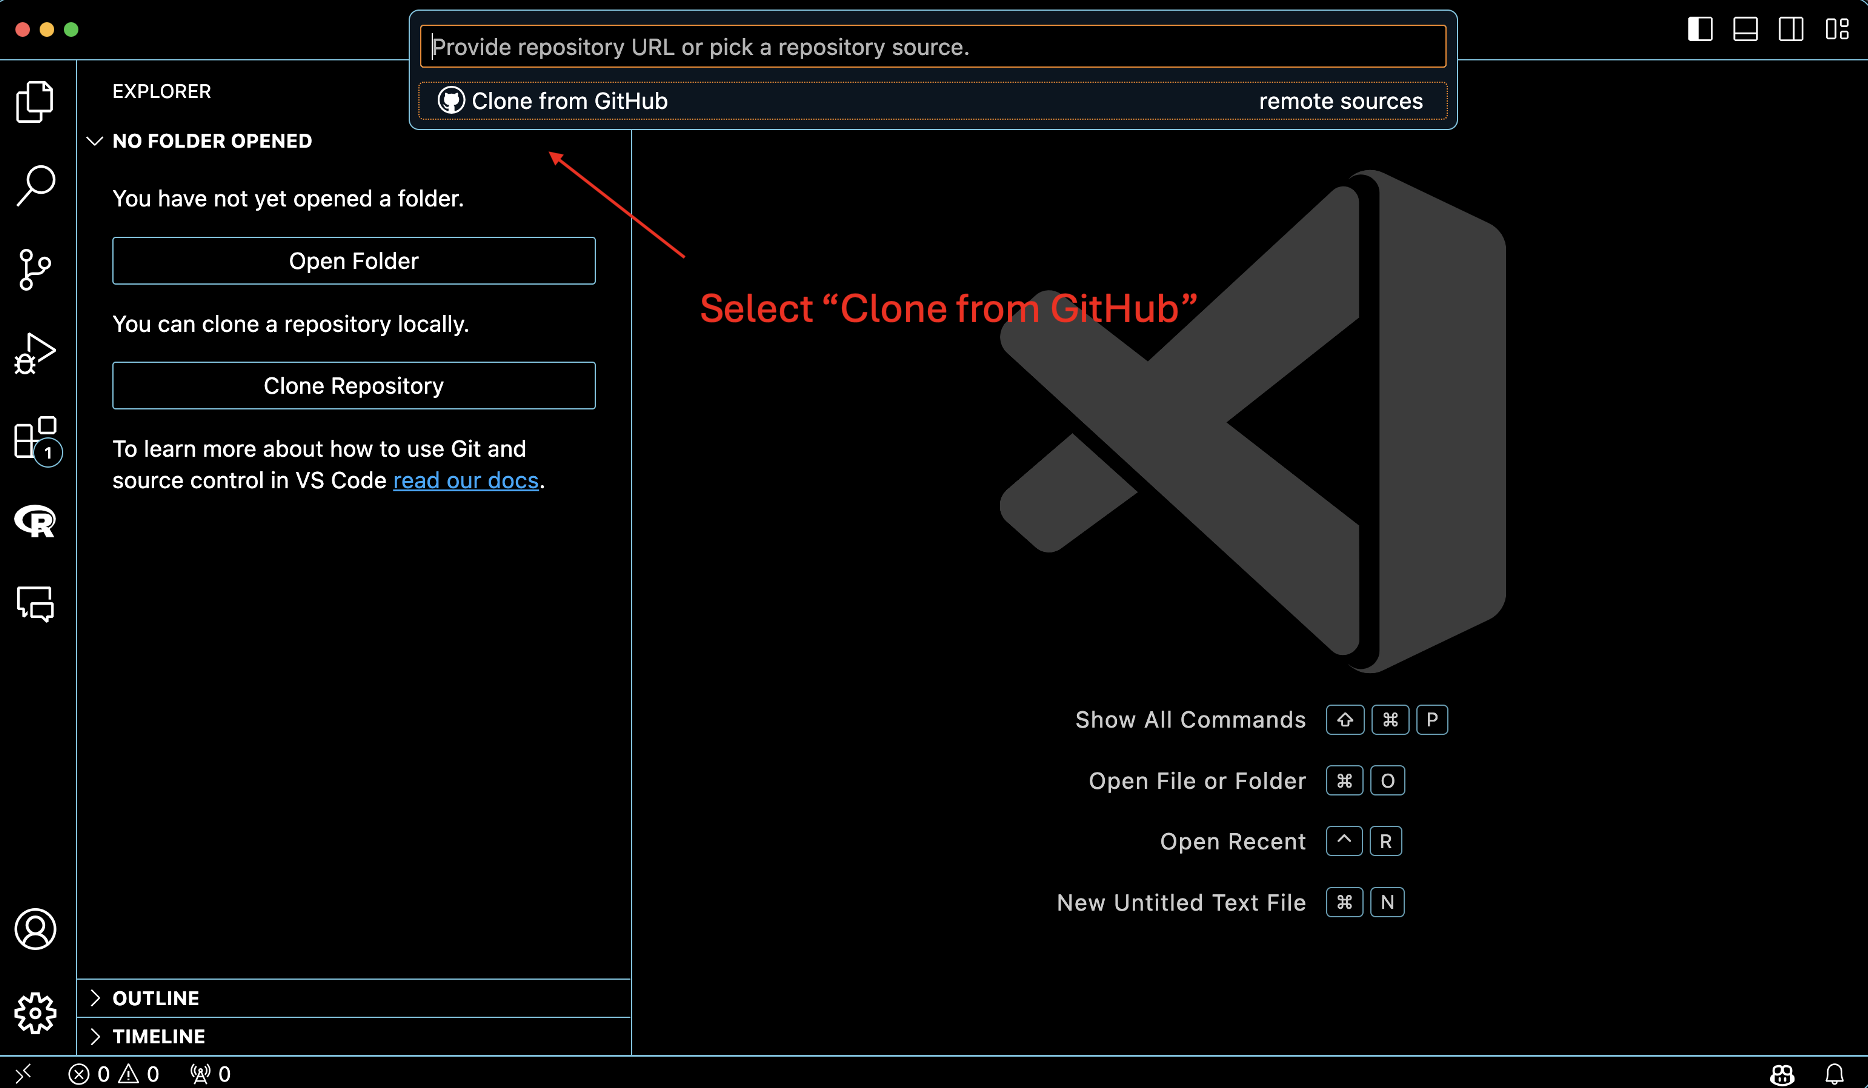
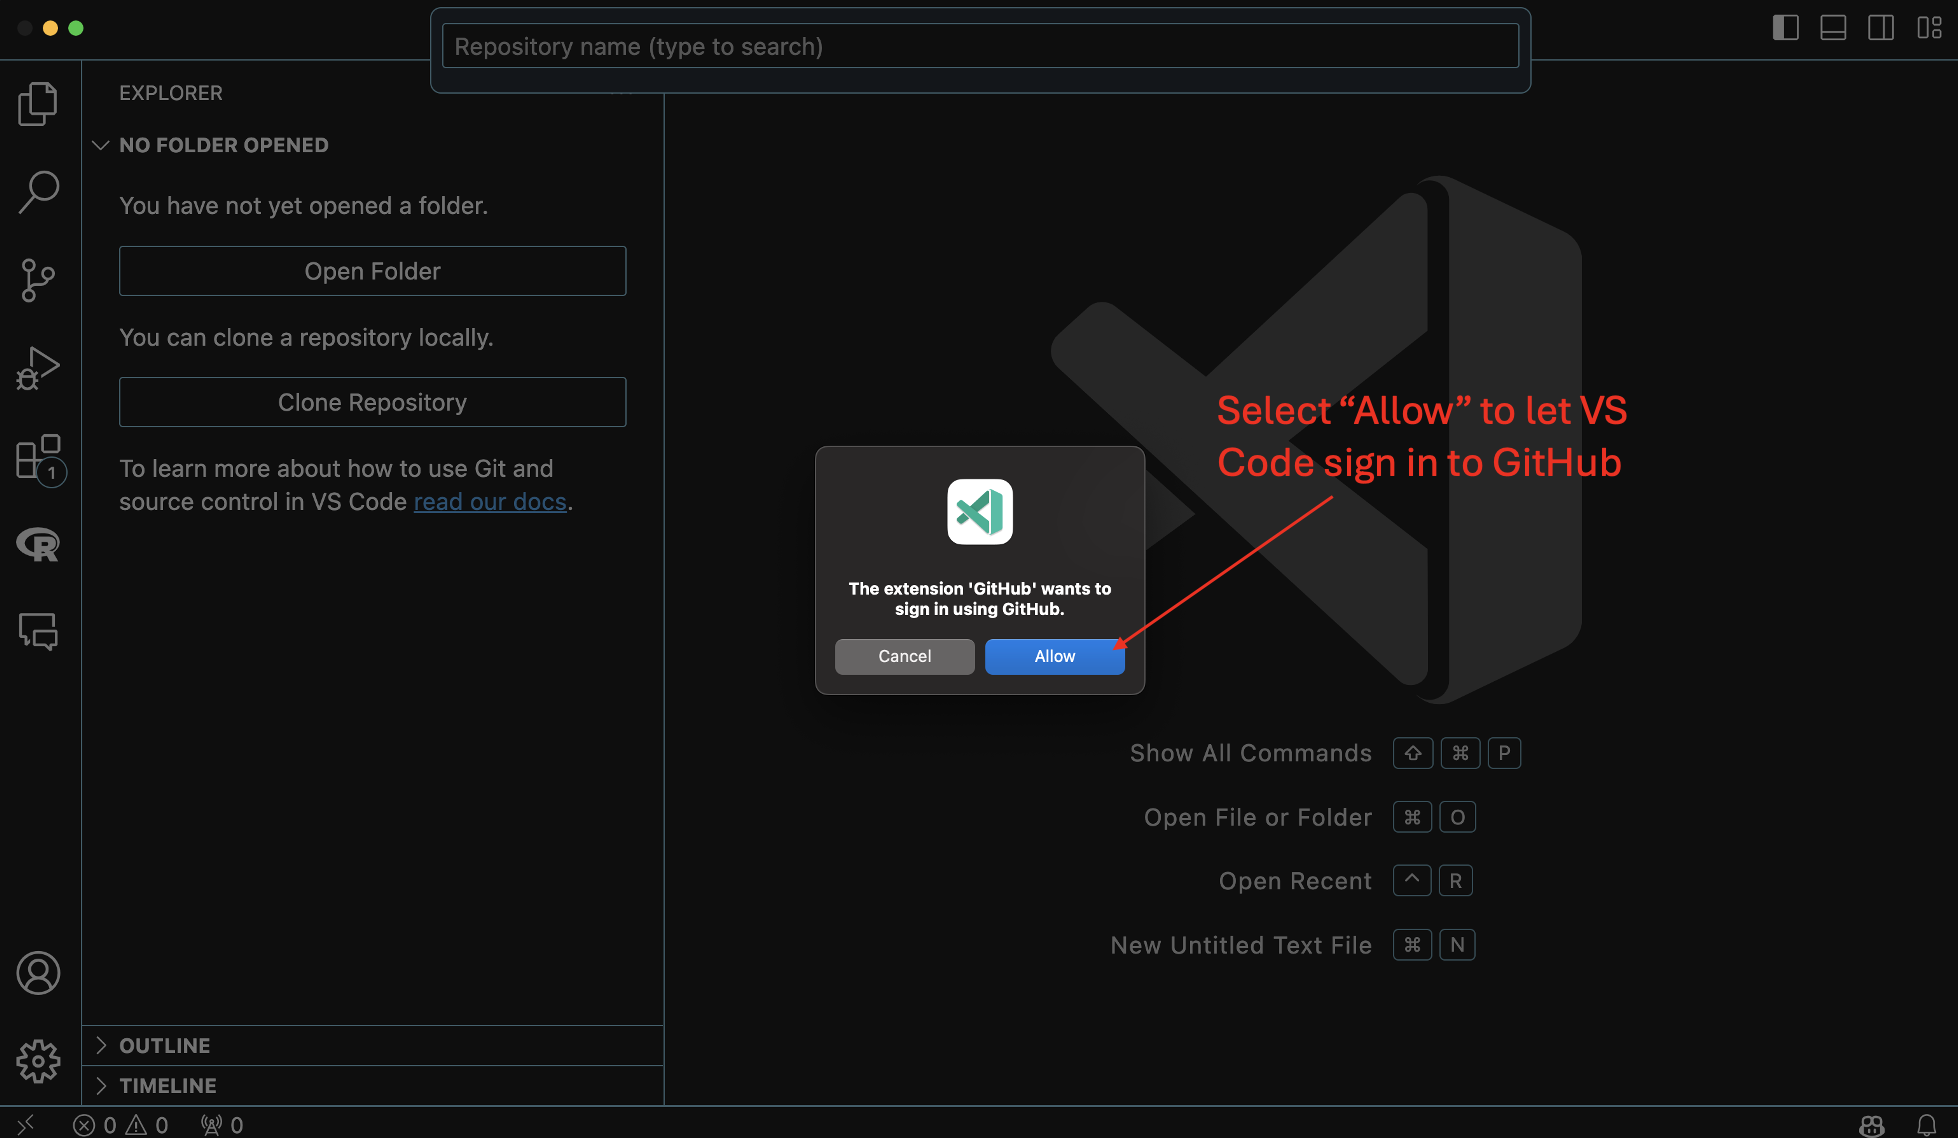
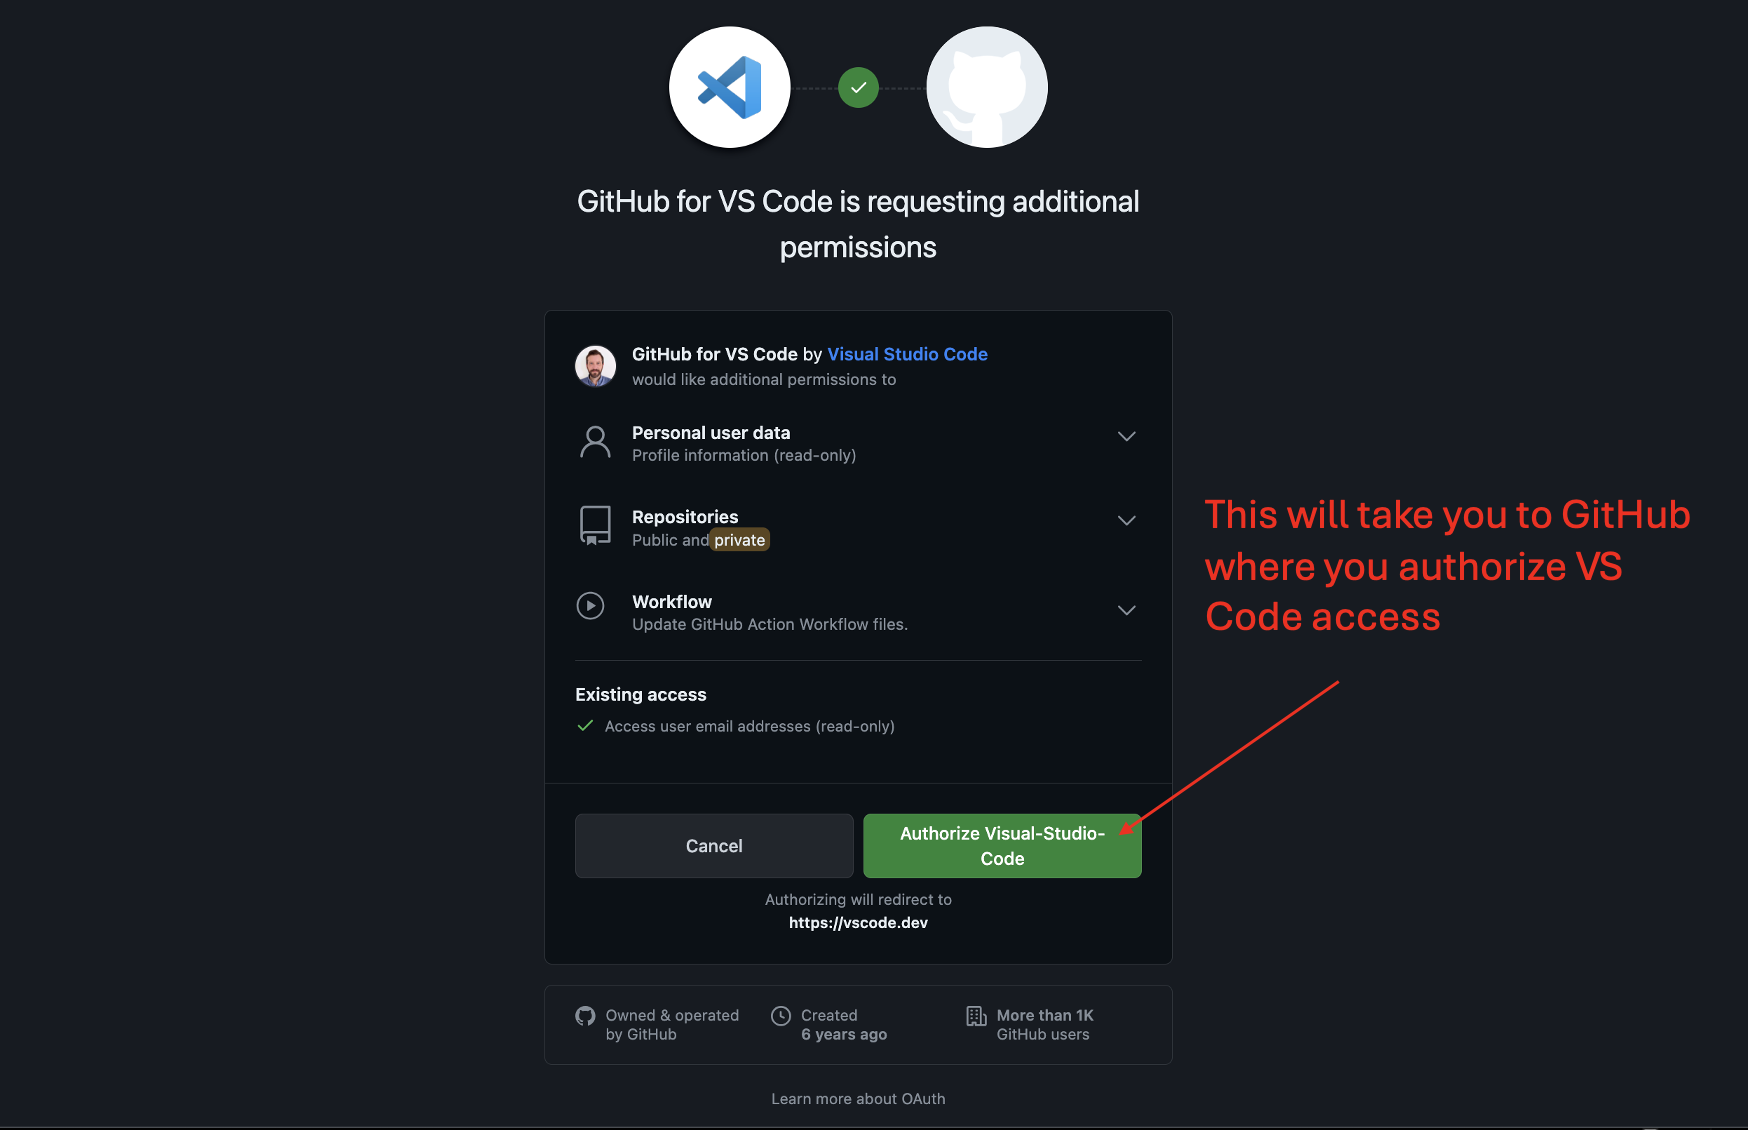
Linking VS Code Project to GitHub Repo
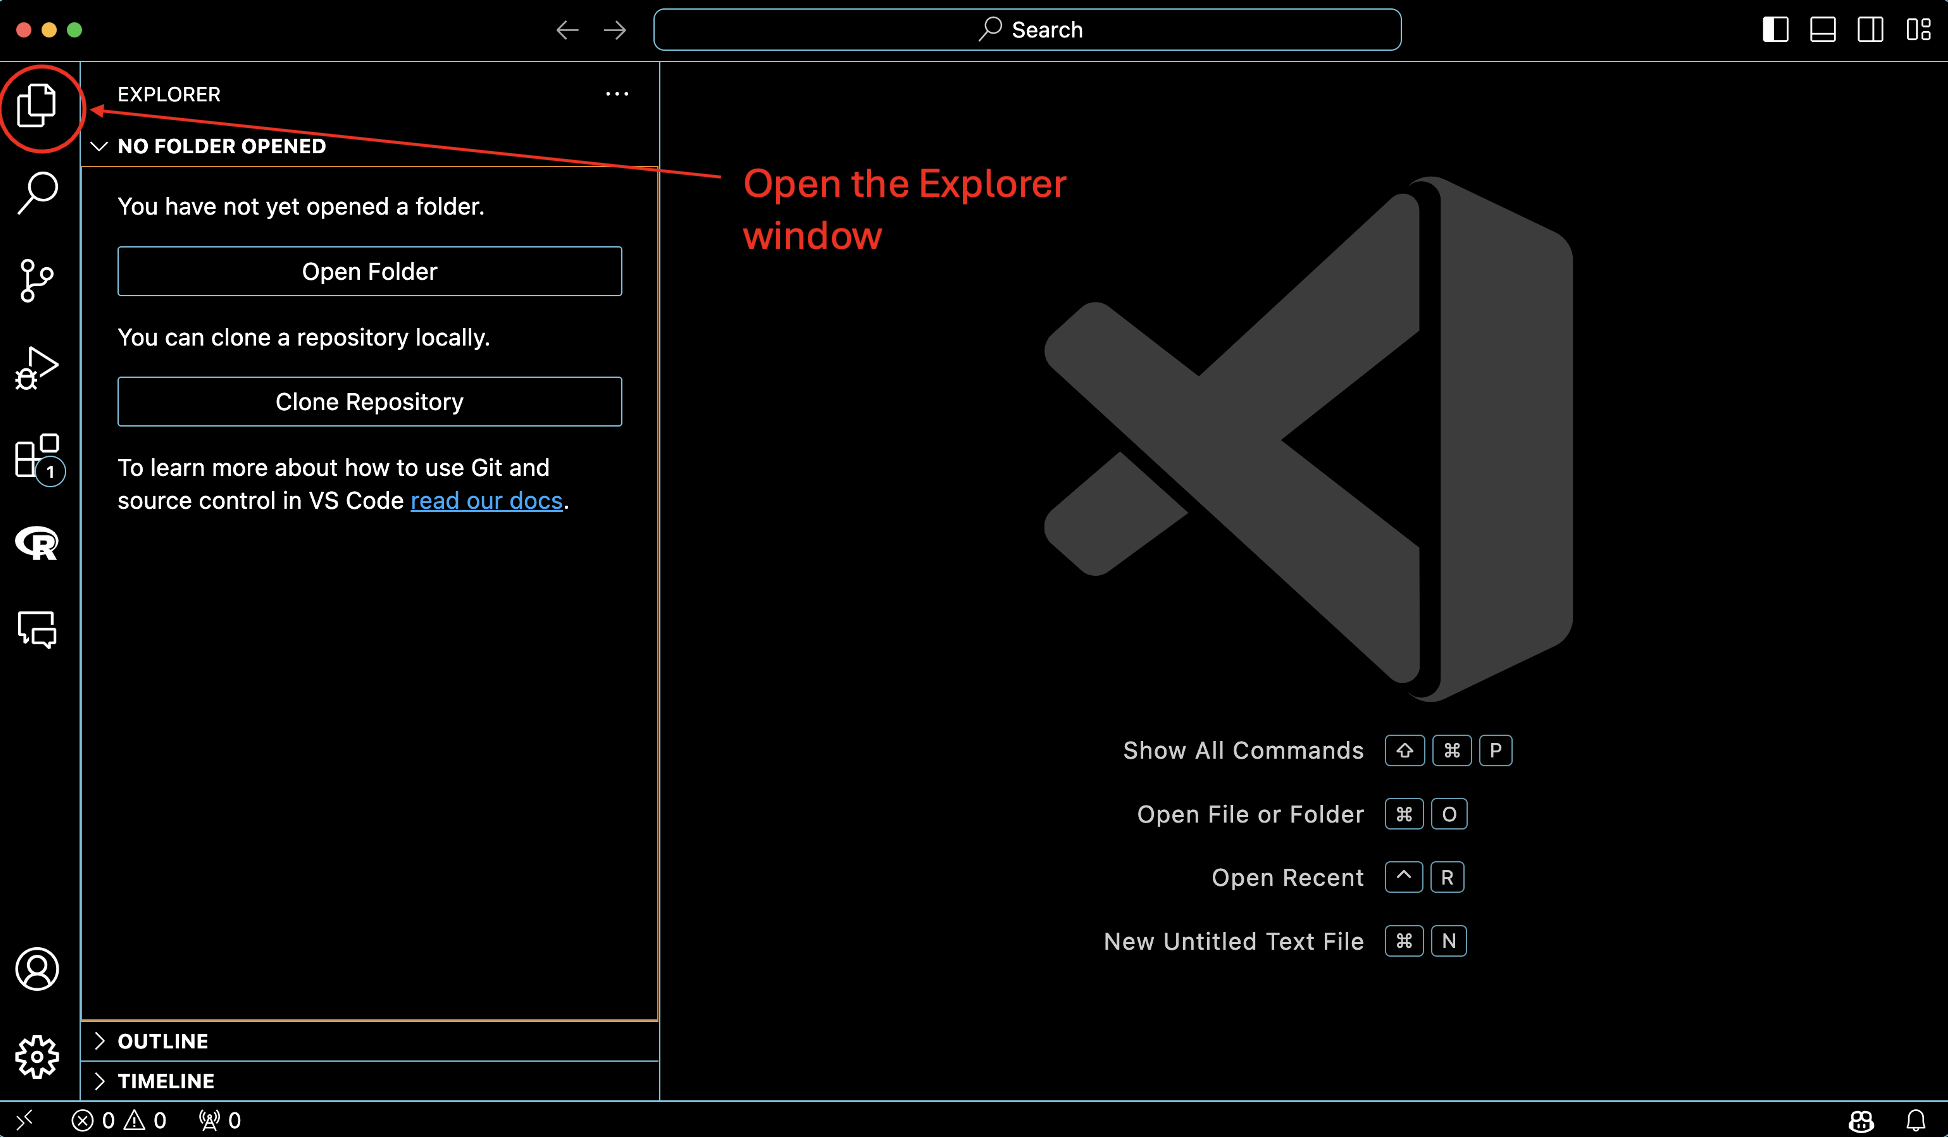
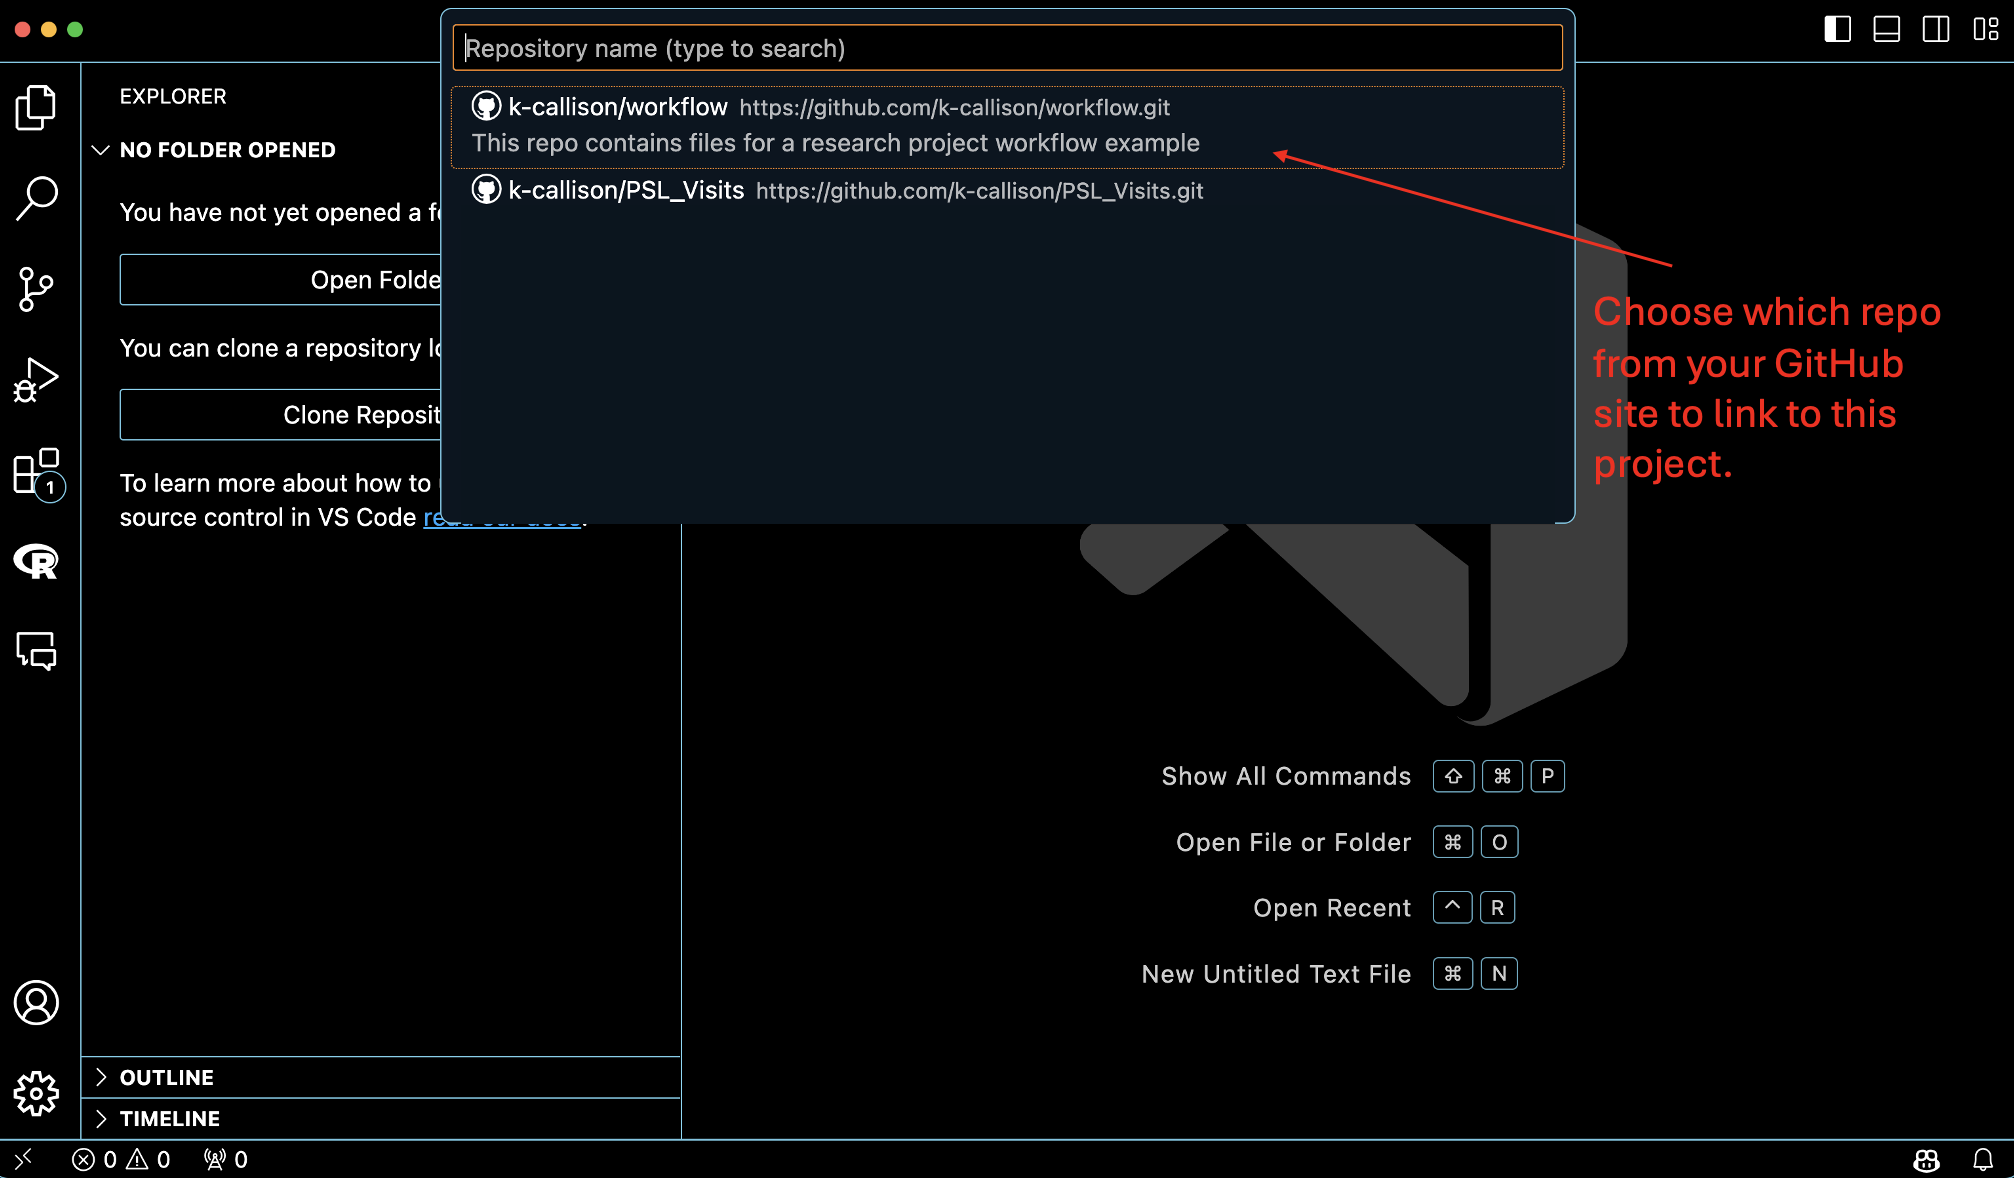
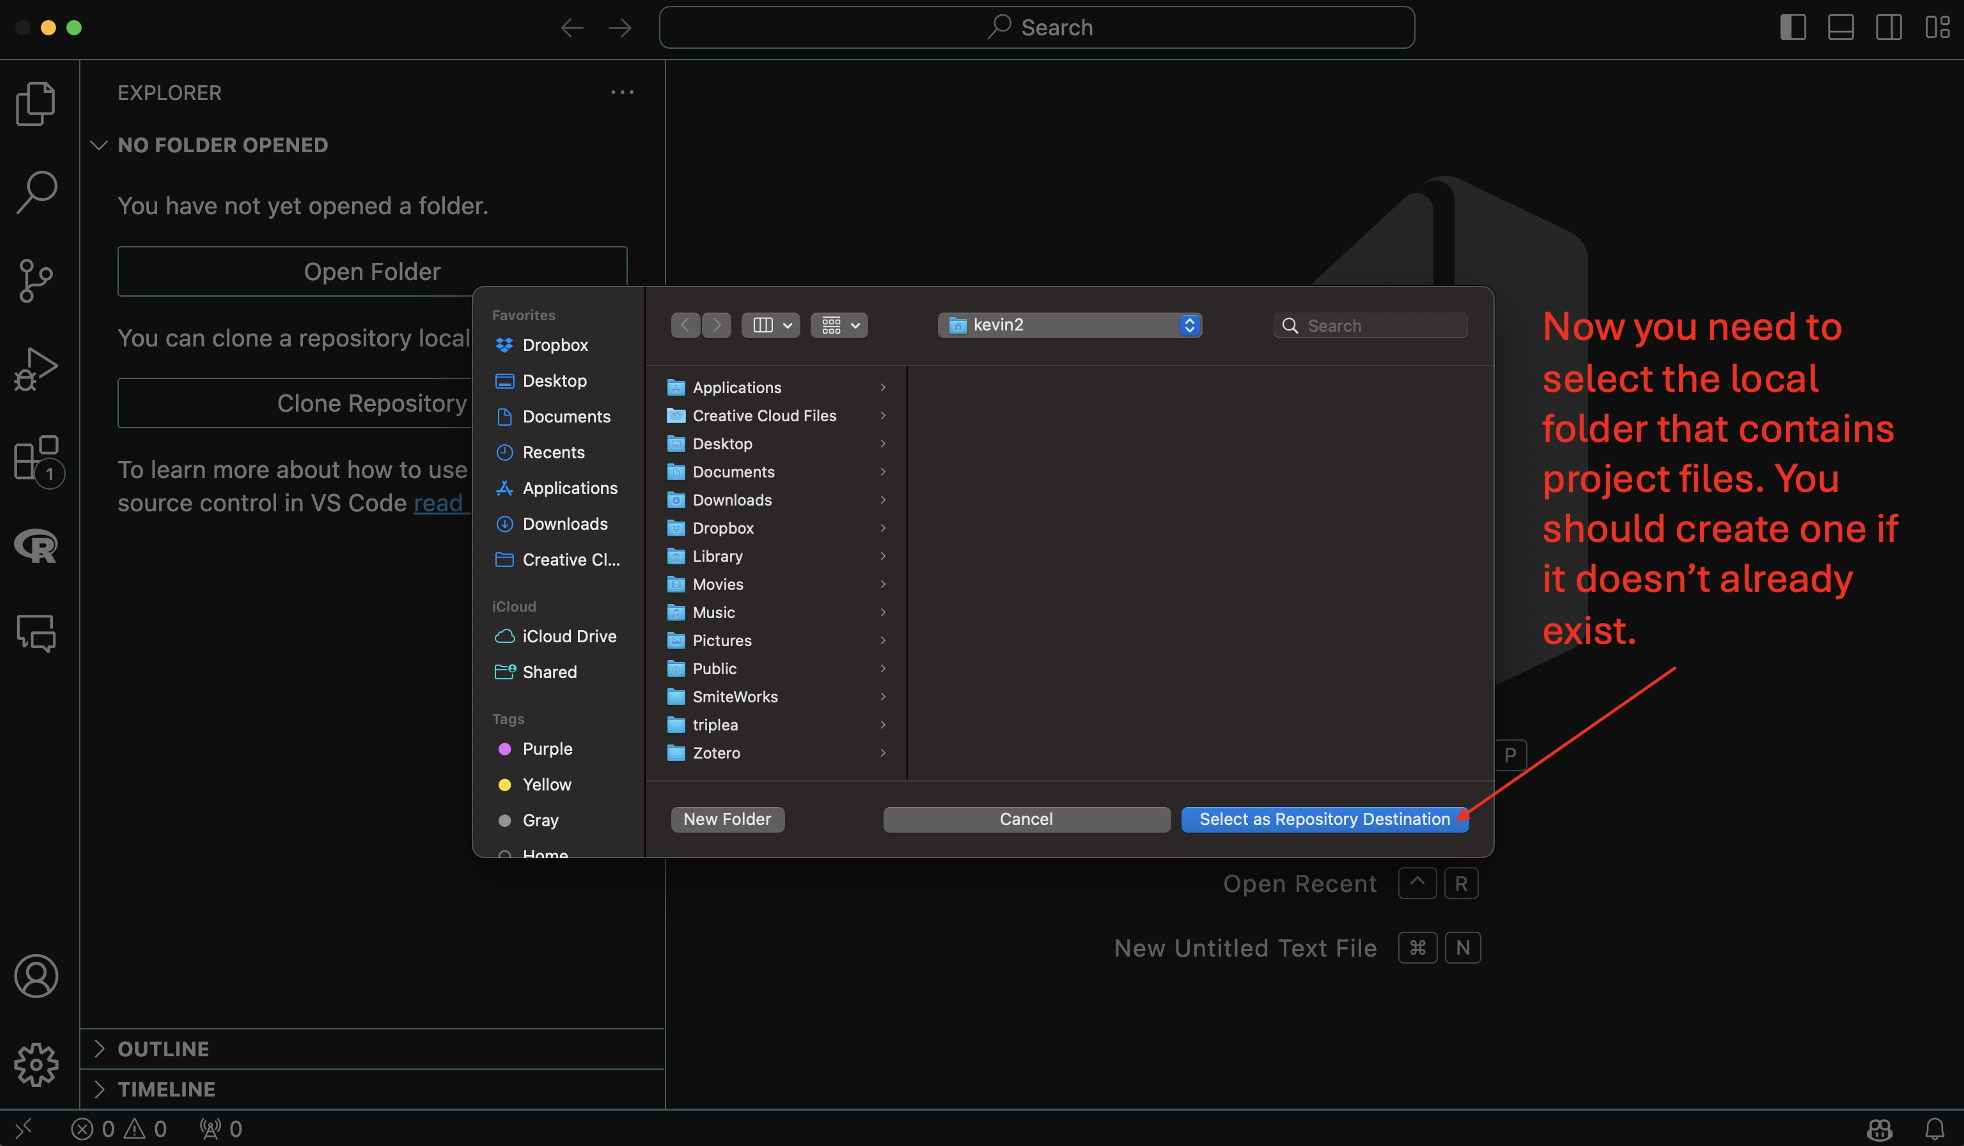
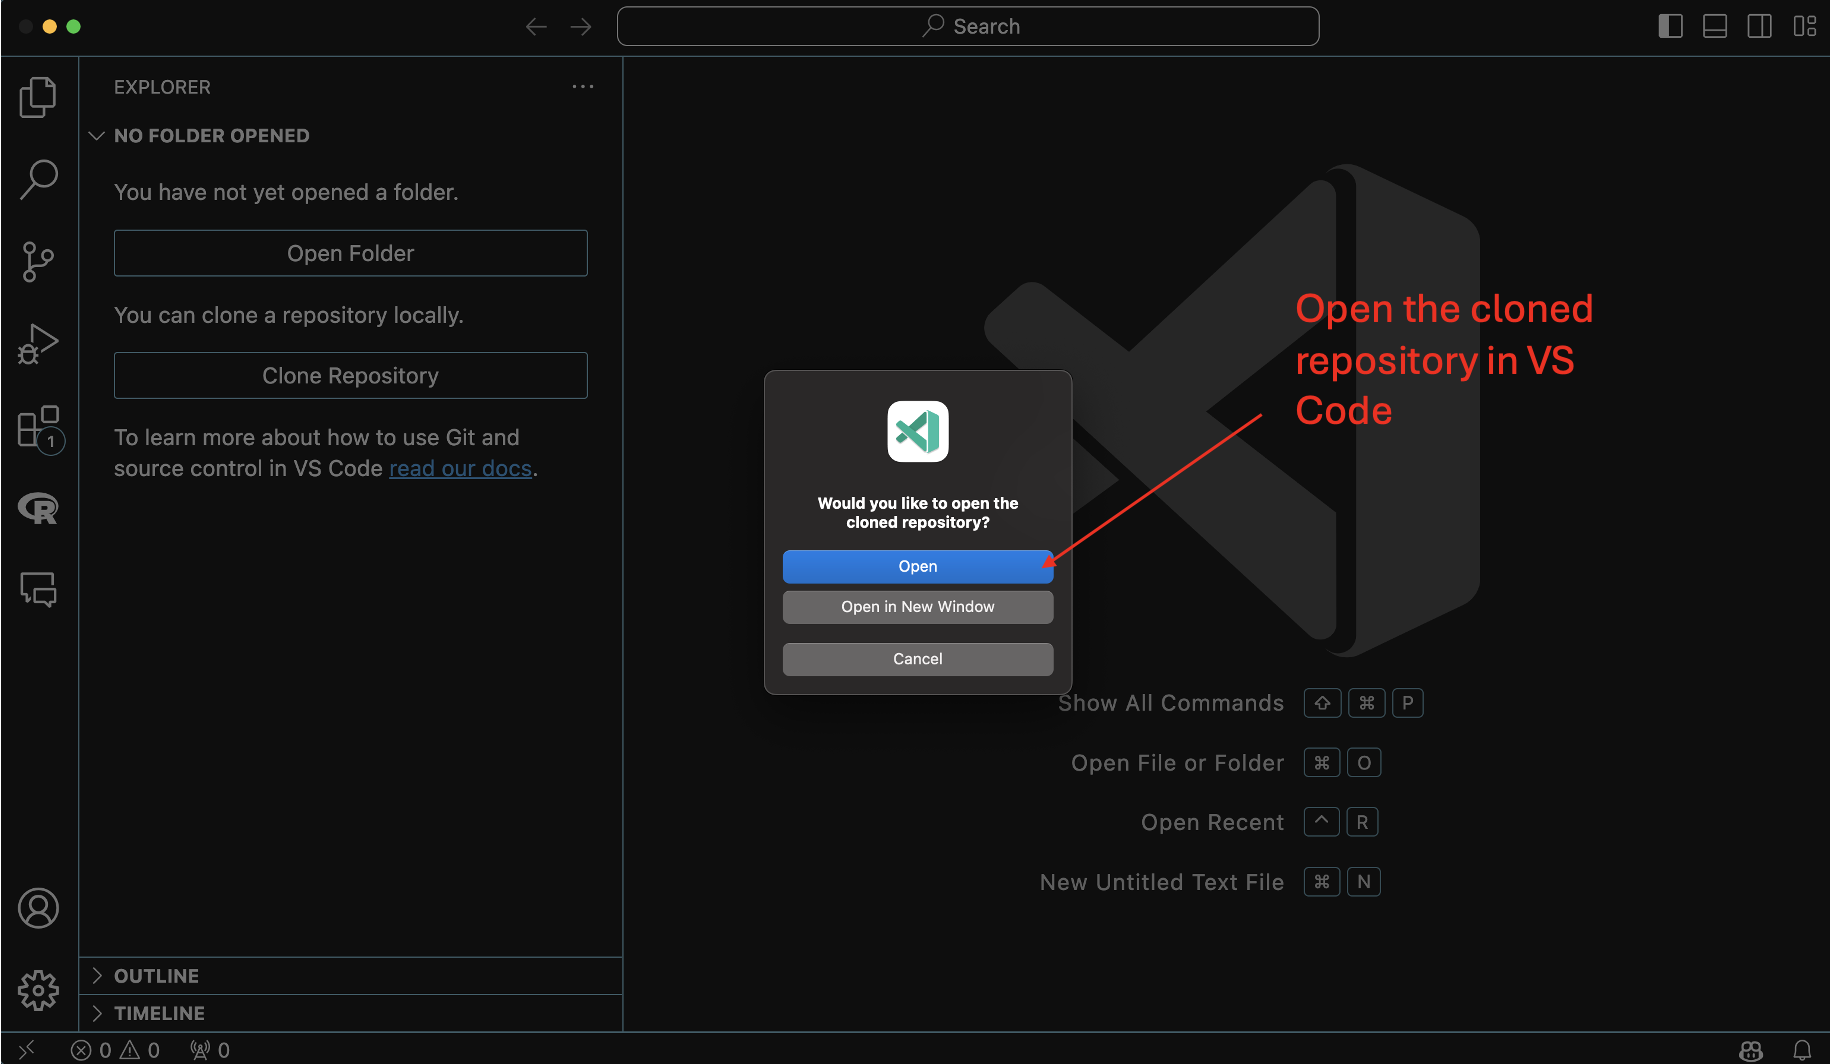
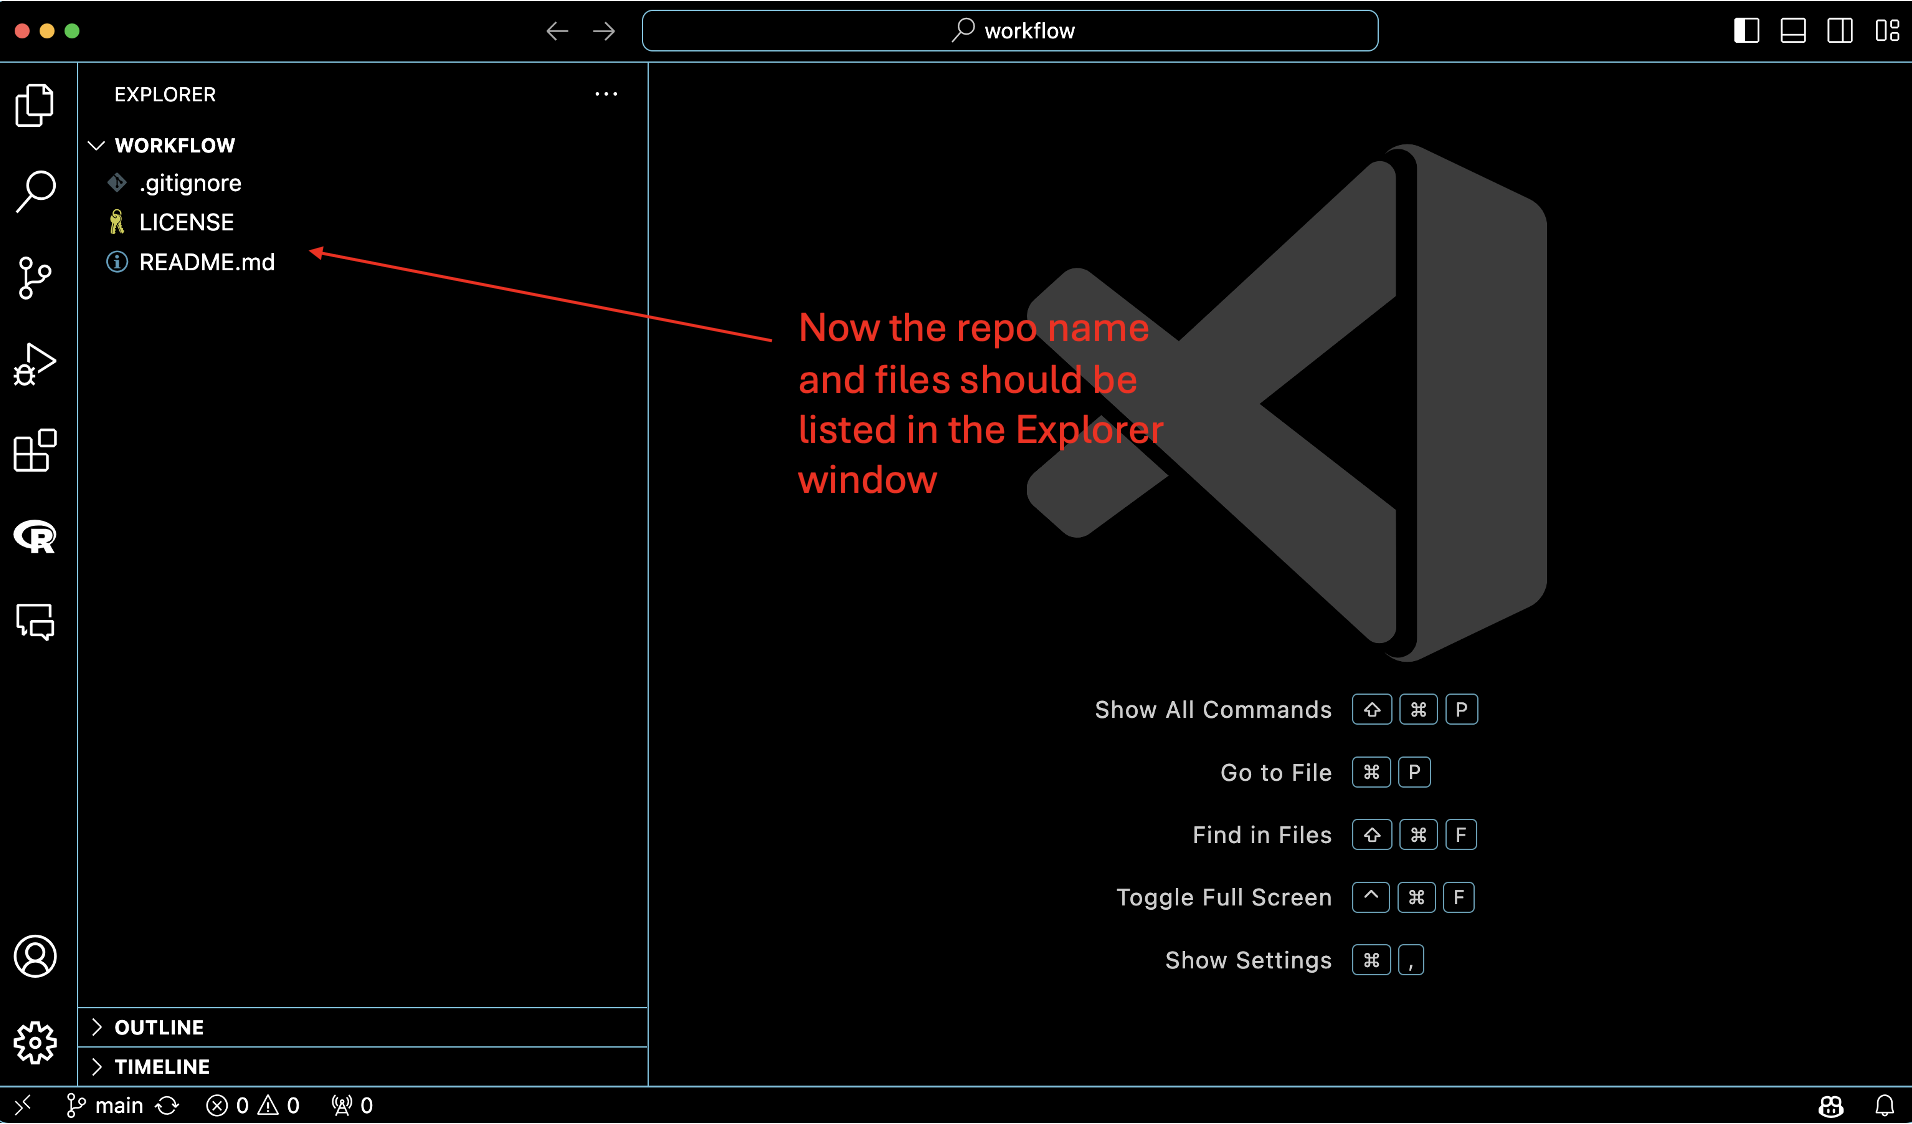
One you’ve created a repo and made sure that Git is enabled in VS Code, you can clone your GitHub repo to your computer using VS Code as follows:
Pushing Changes to GitHub
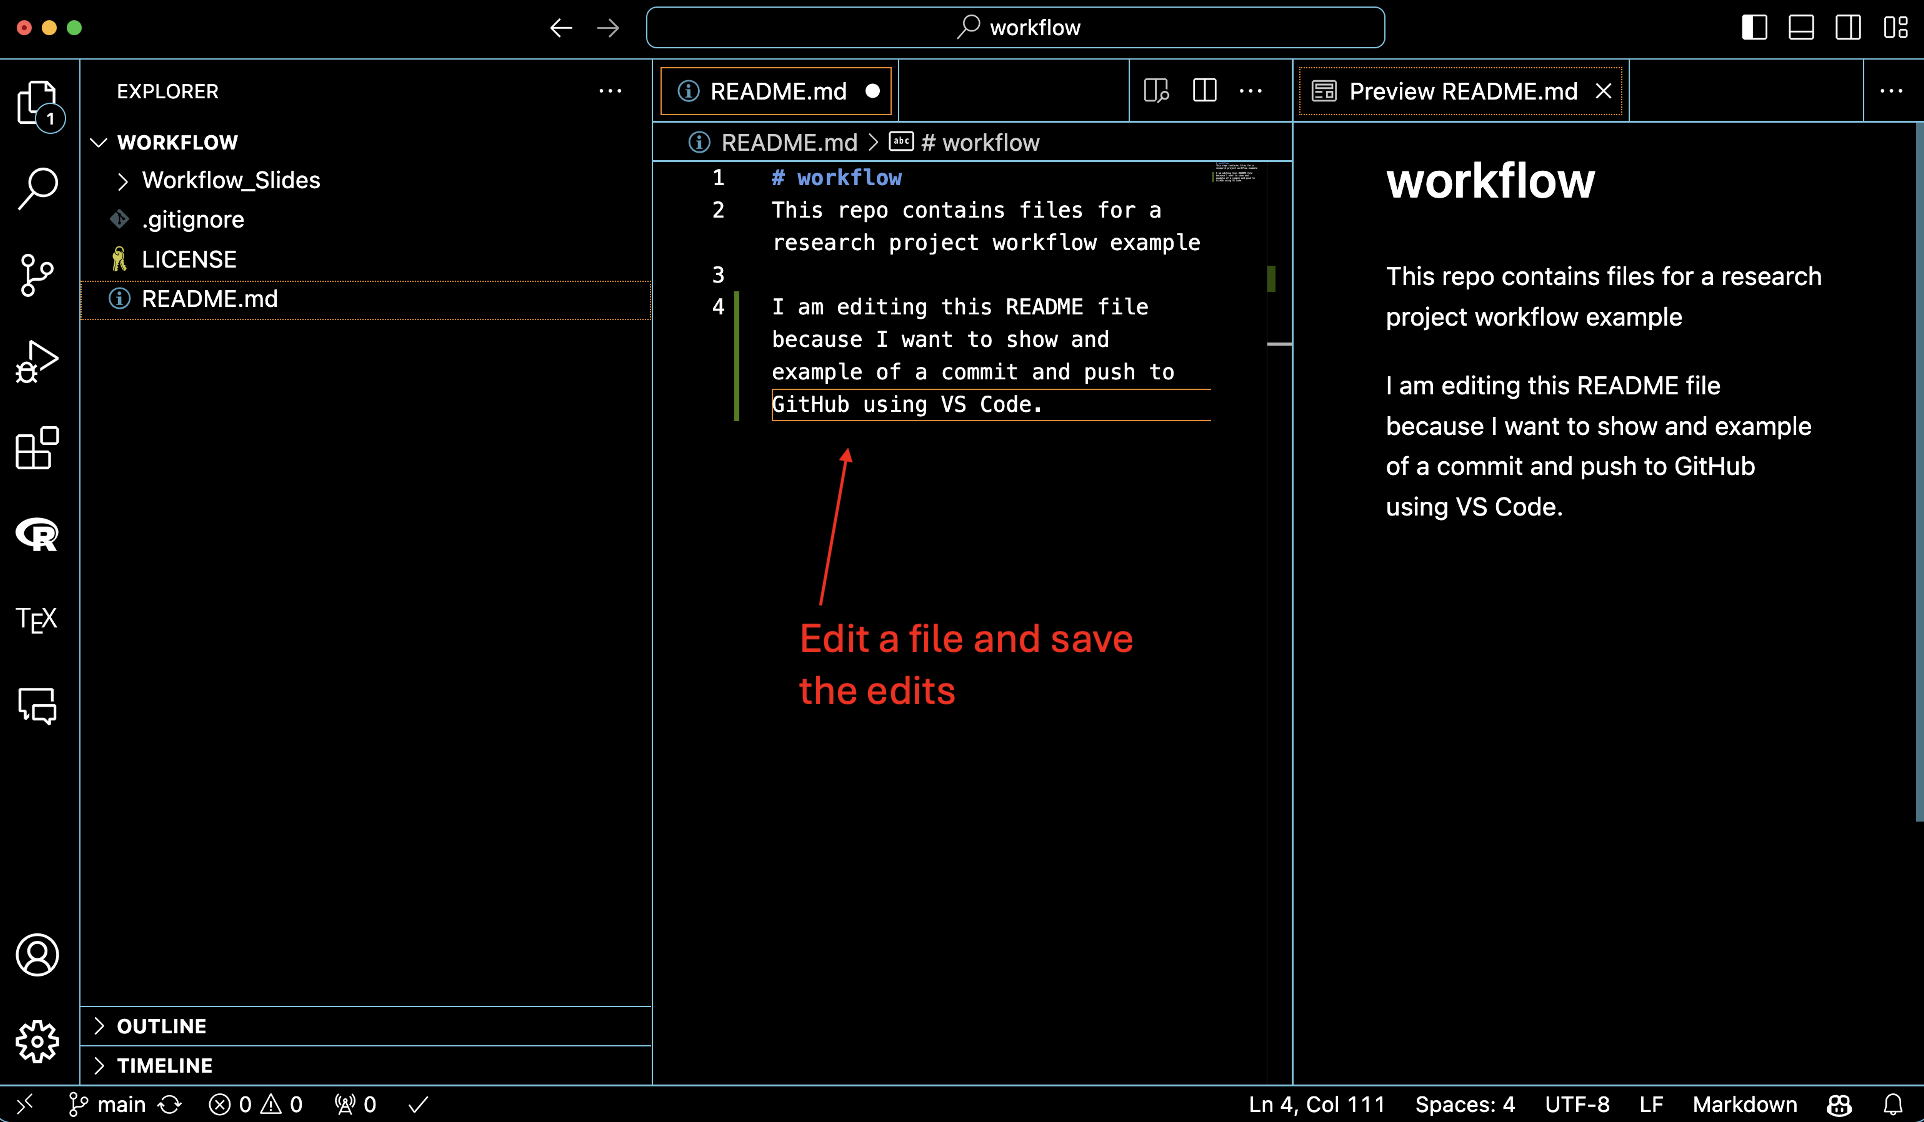
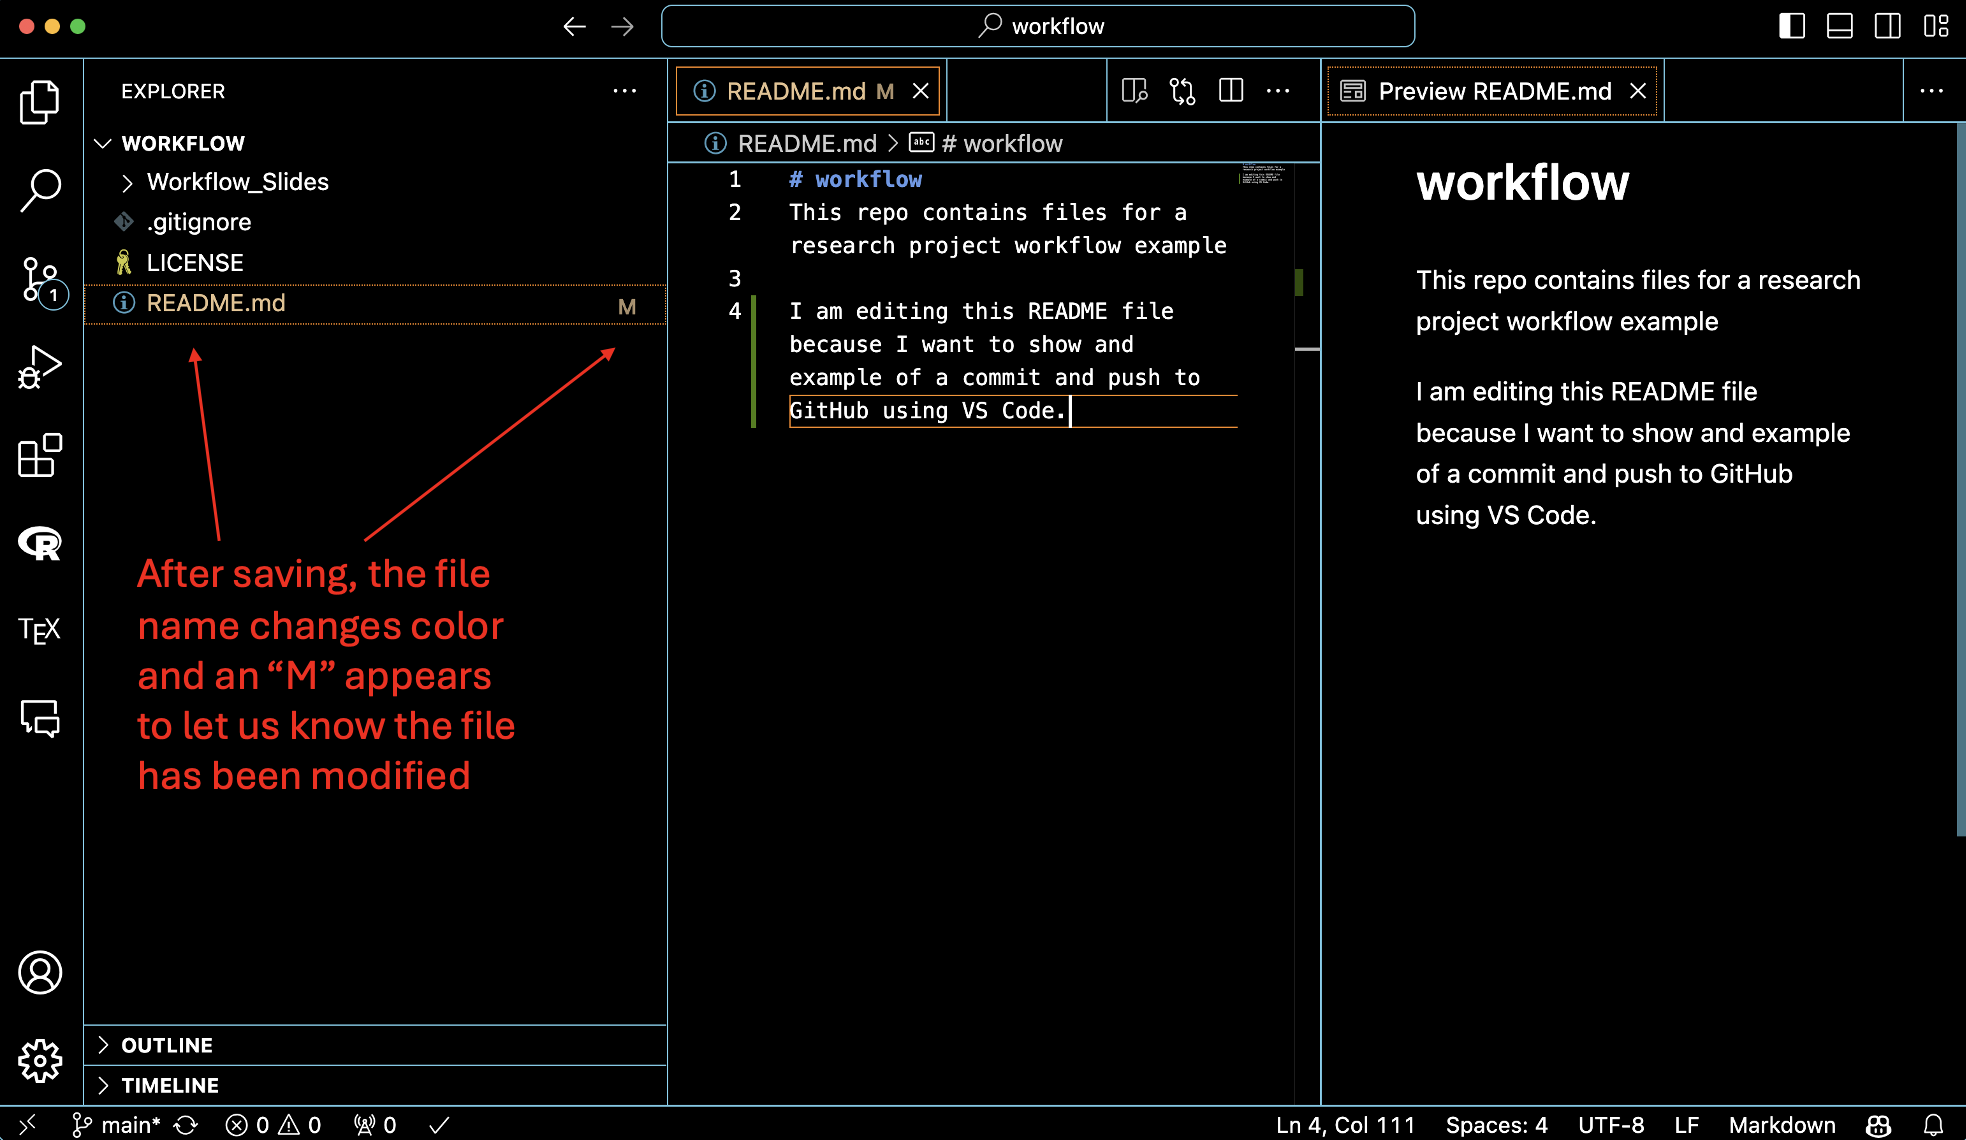
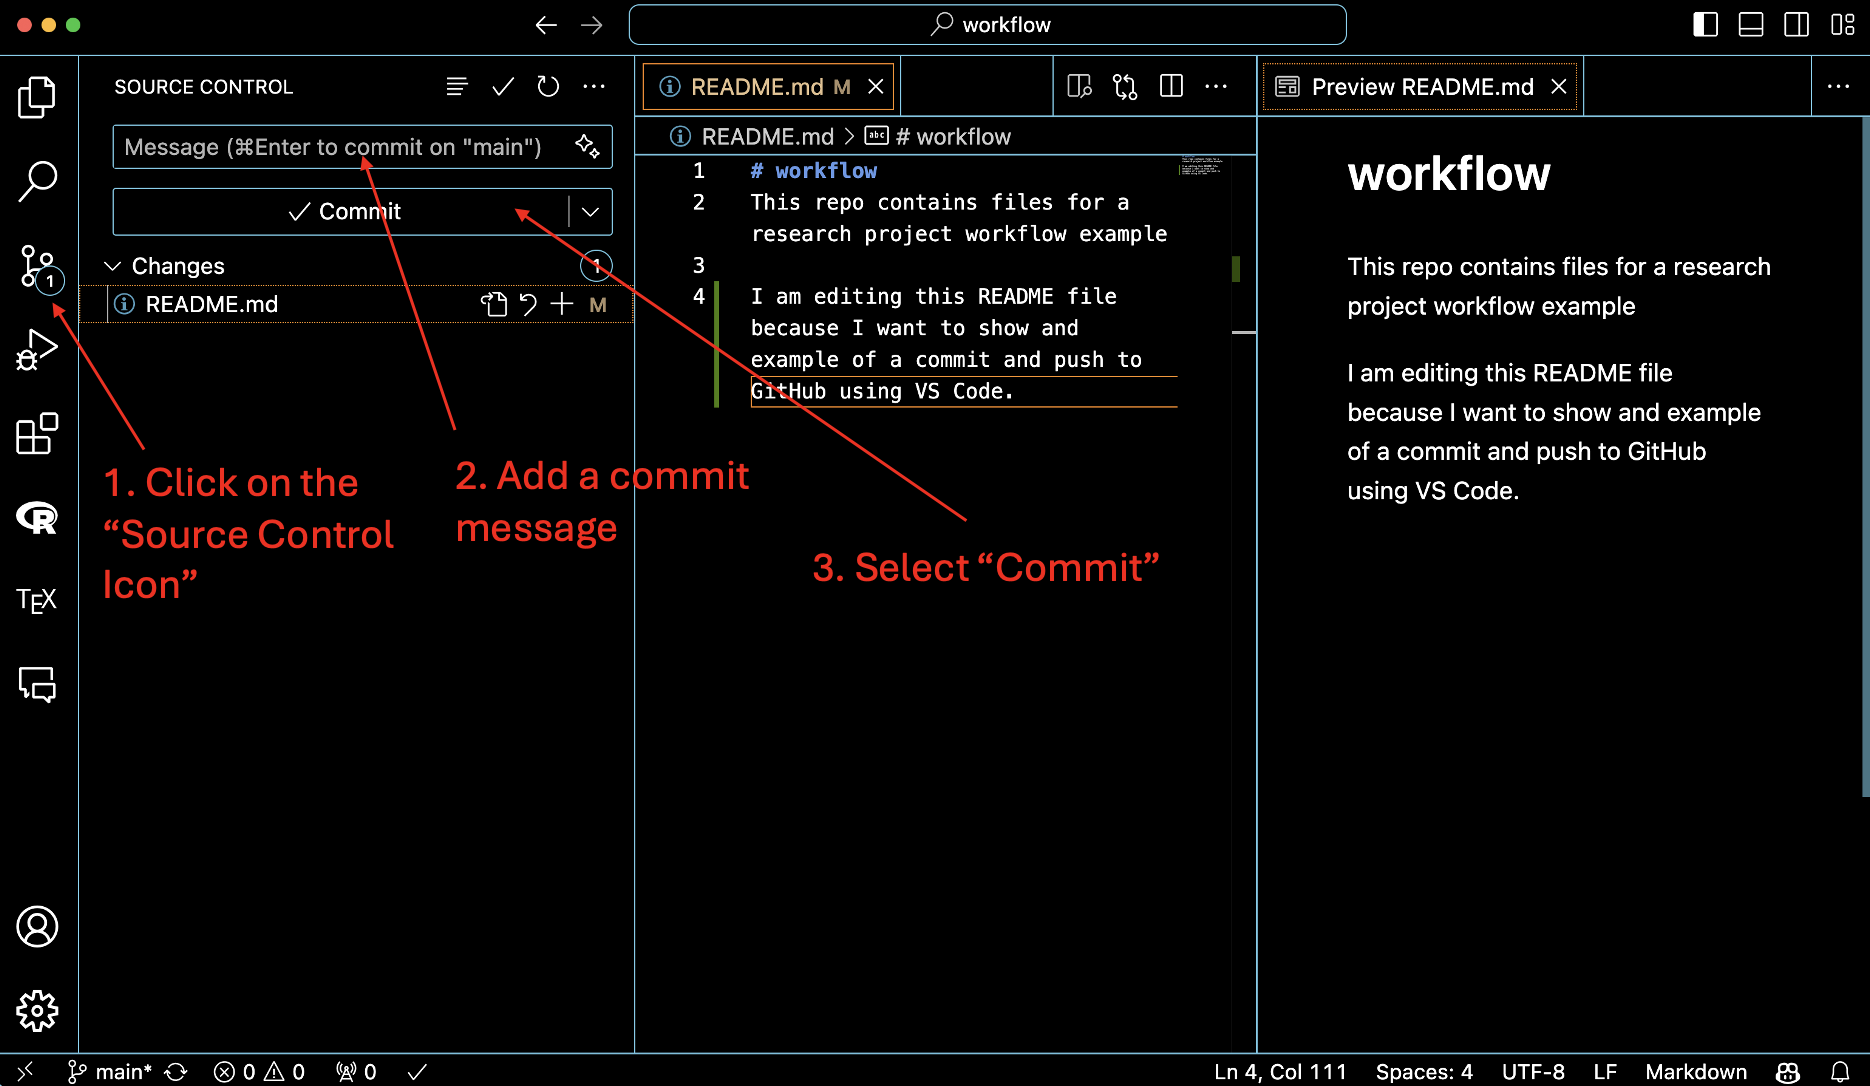
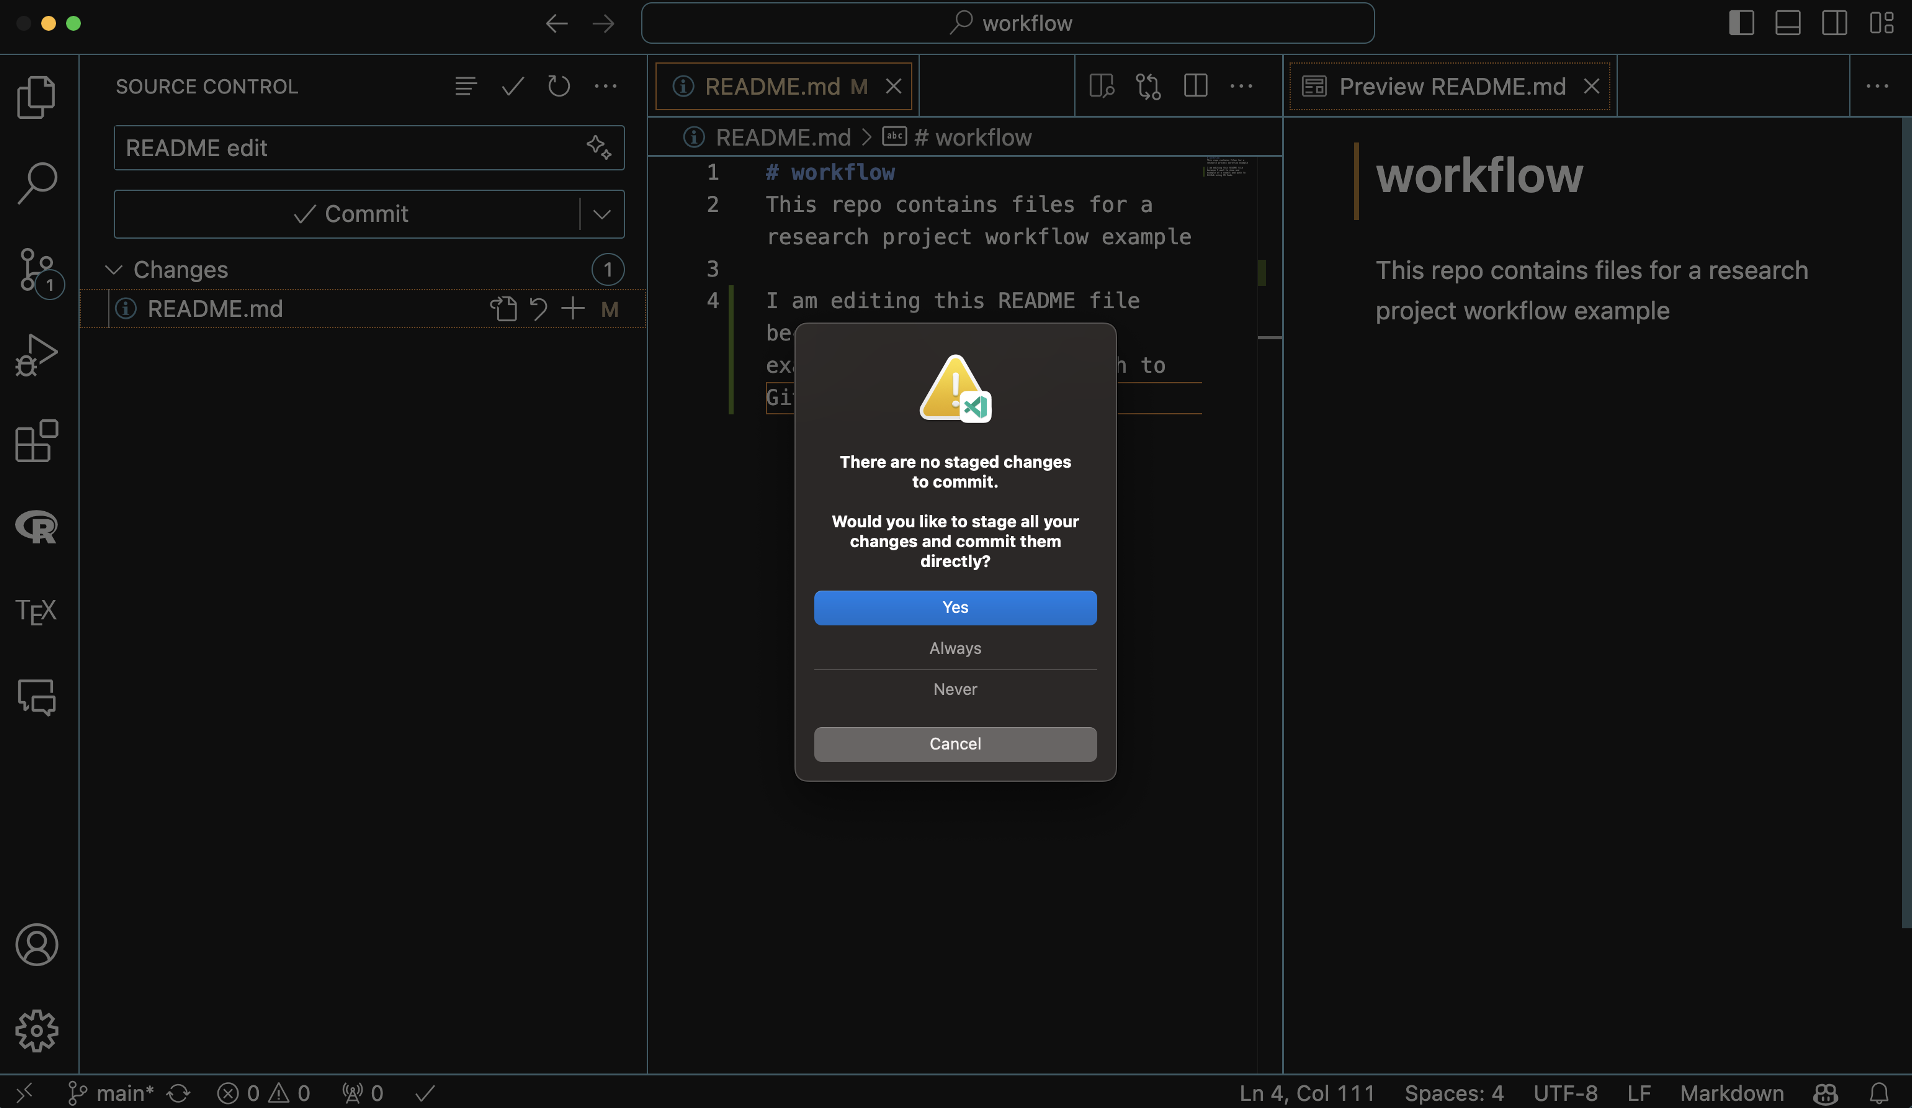
Once you’ve linked your VS Code project to your GitHub repo, you can now push file changes to GitHub. Let’s walk through an example of editing a file and pushing those edits to GitHub.
Here VS Code will ask you if you want to stage all of your changes and commit them directly. You can go ahead and answer “always” to this prompt so that you don’t have to go through the extra step of staging your changes in the future.
Before selecting “Sync Changes” make sure the branch name in VS Code (here it’s called “main”) matches the branch name on GitHub, otherwise you’ll get an error when you try and push your changes. If the names don’t match, you can click on the branch name in the lower left-hand corner of VS Code and change the name.
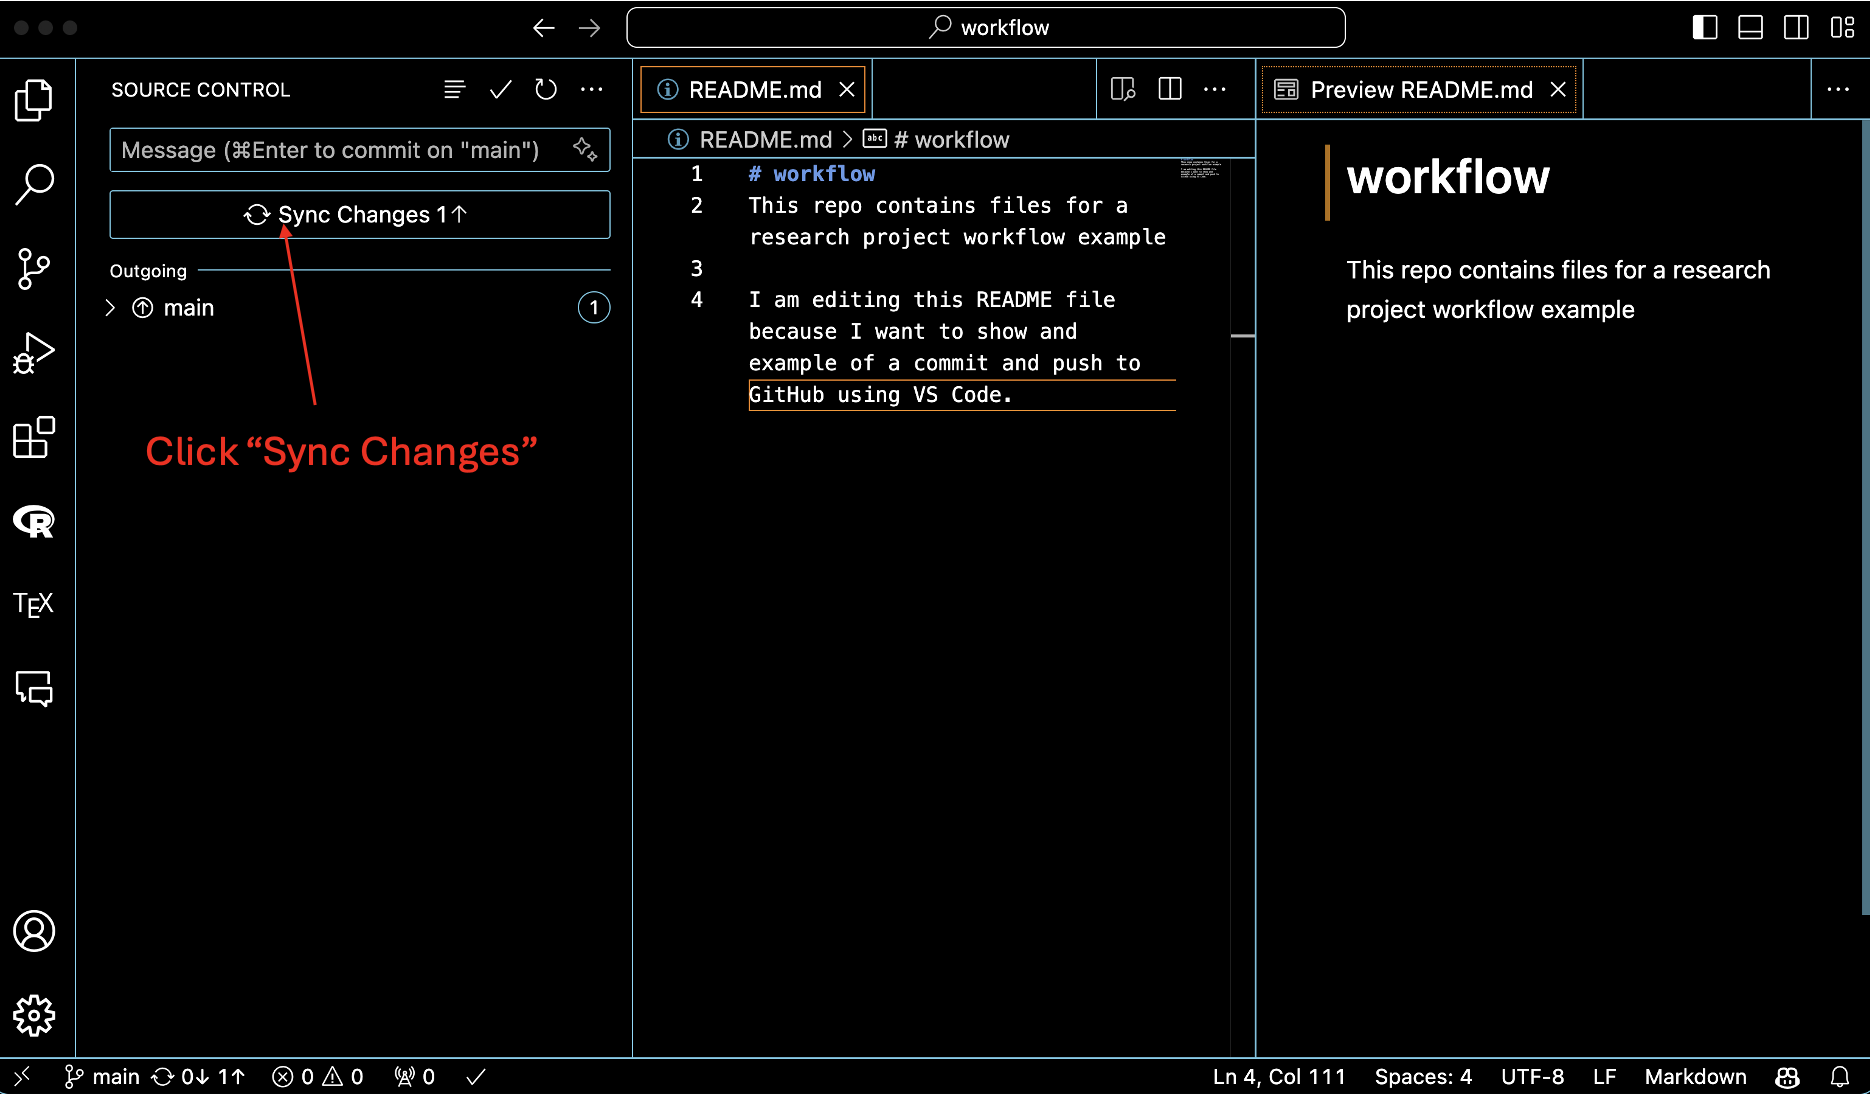
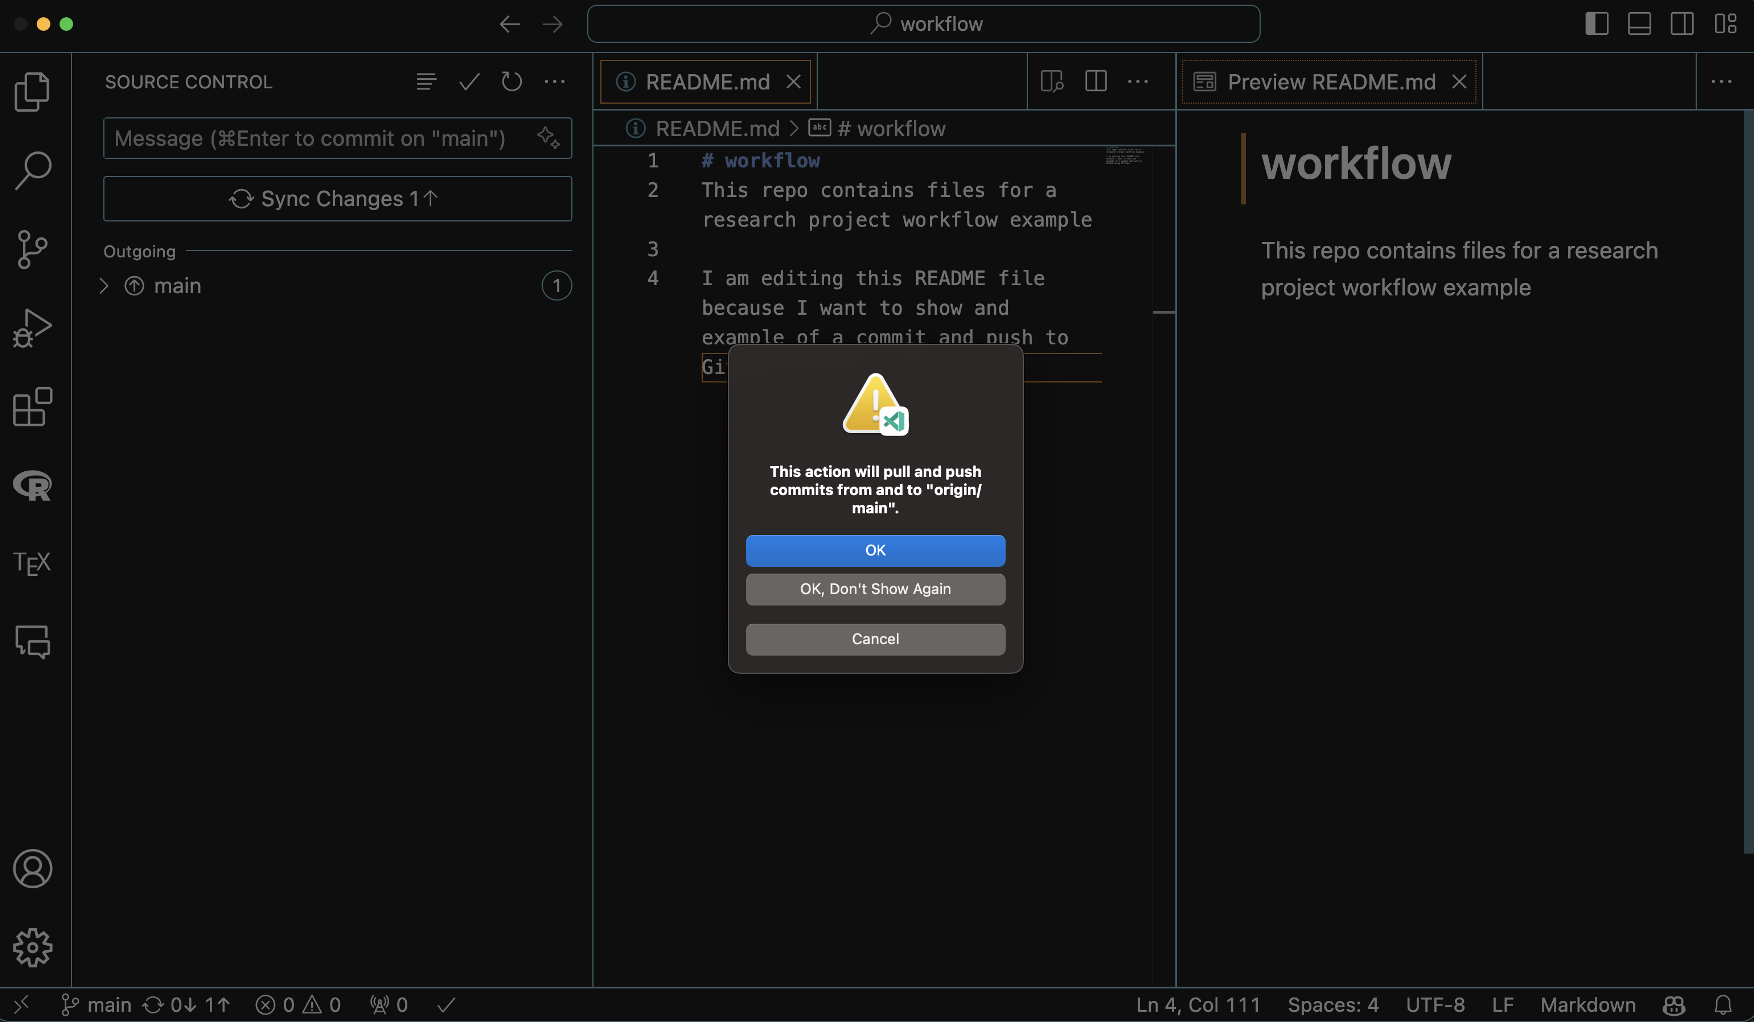
The default VS Code setting is to both push and pull changes to and from GitHub simultaneously (this is in contrast to R Studio, for example, which requires separate push/pull requests).
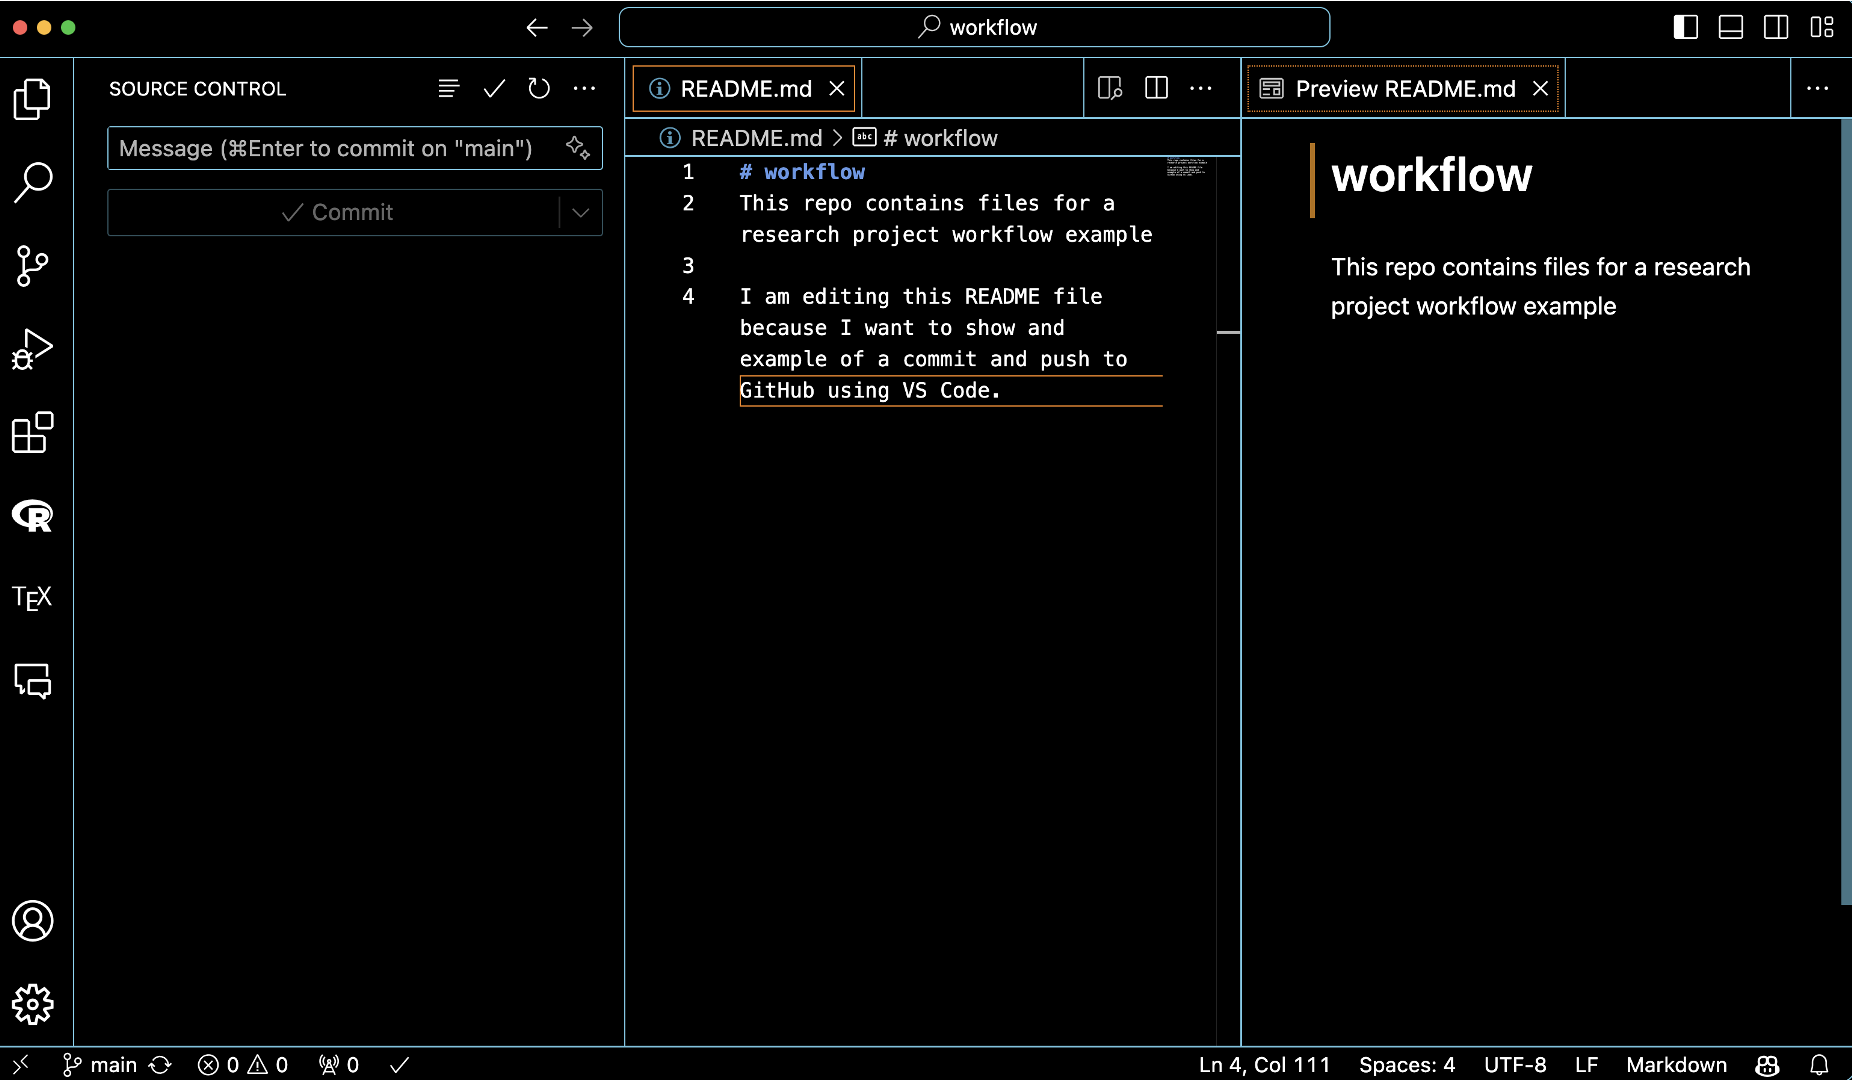
Once you’ve synced the changes, you will see that the Source Control window is empty and your changes have been pushed to GitHub (we’ll see this from the GitHub perspective shortly.)
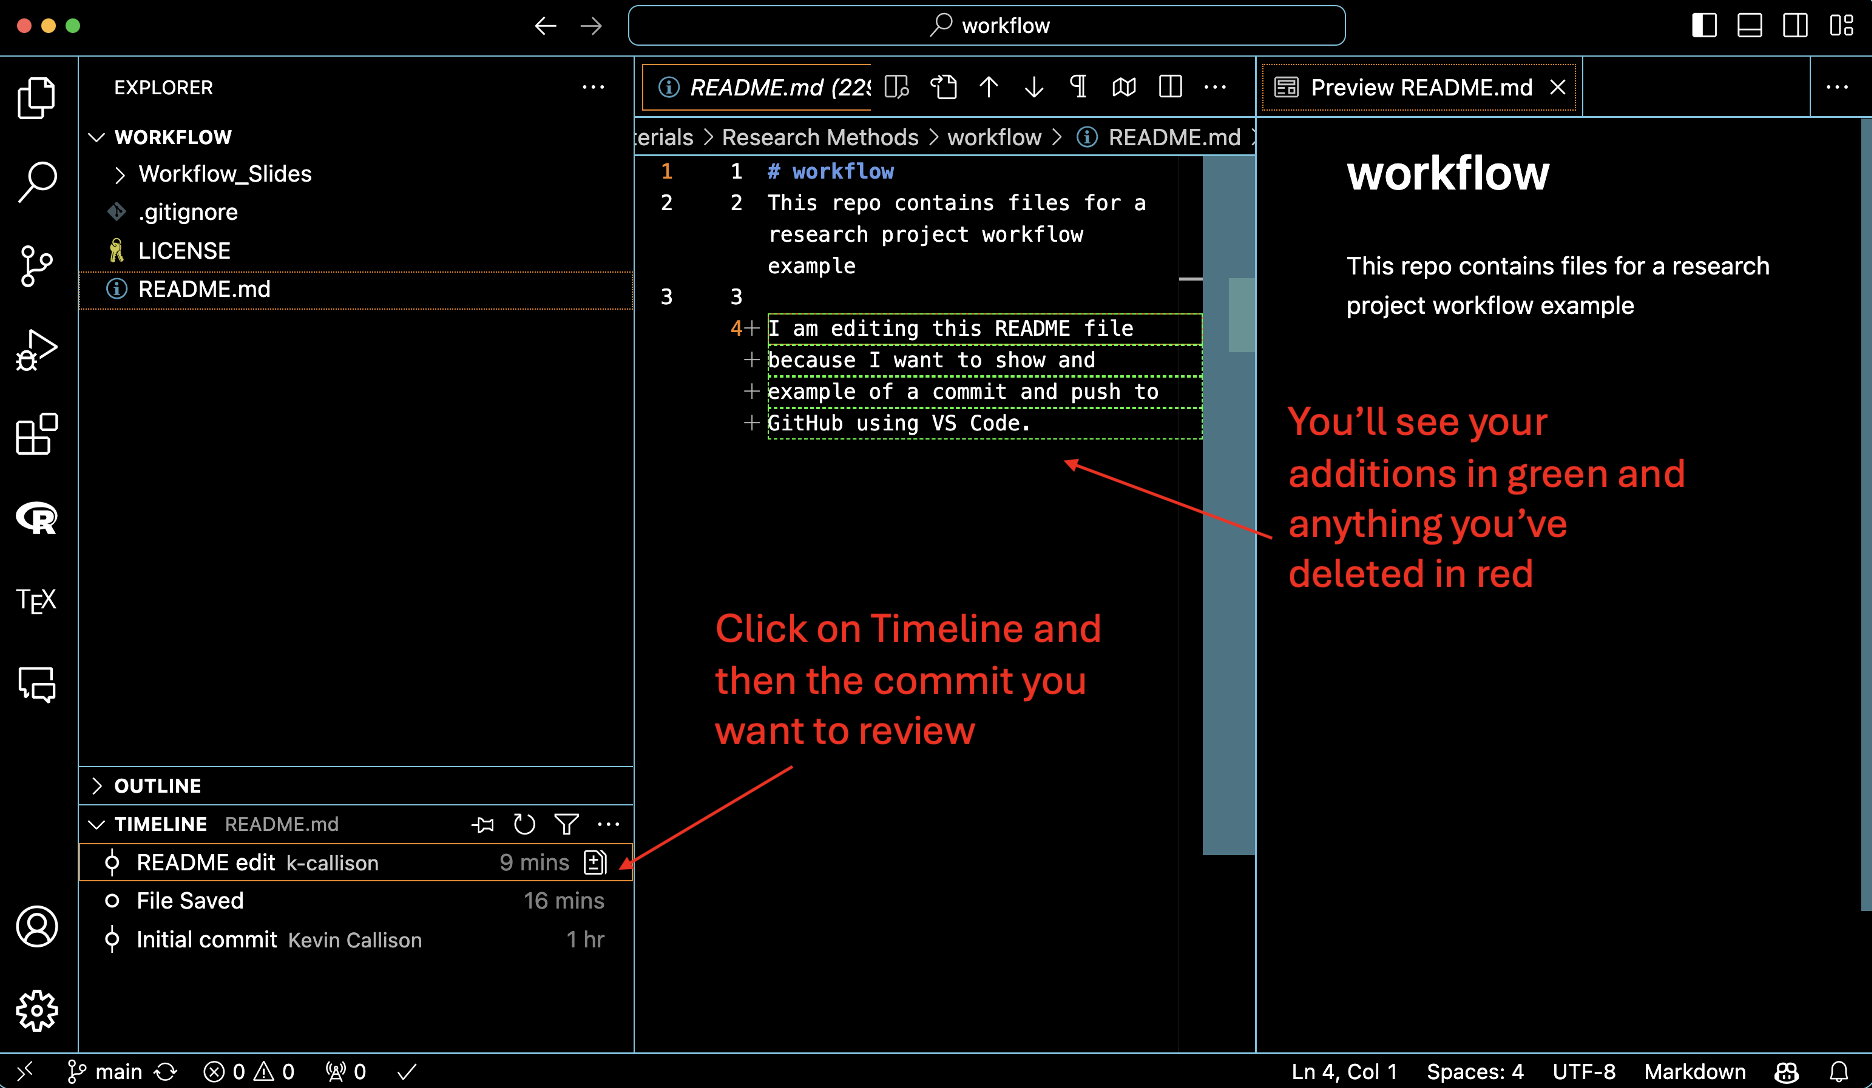
To track project changes through various commits, you can go back to the Explorer Window and click on “Timeline”.
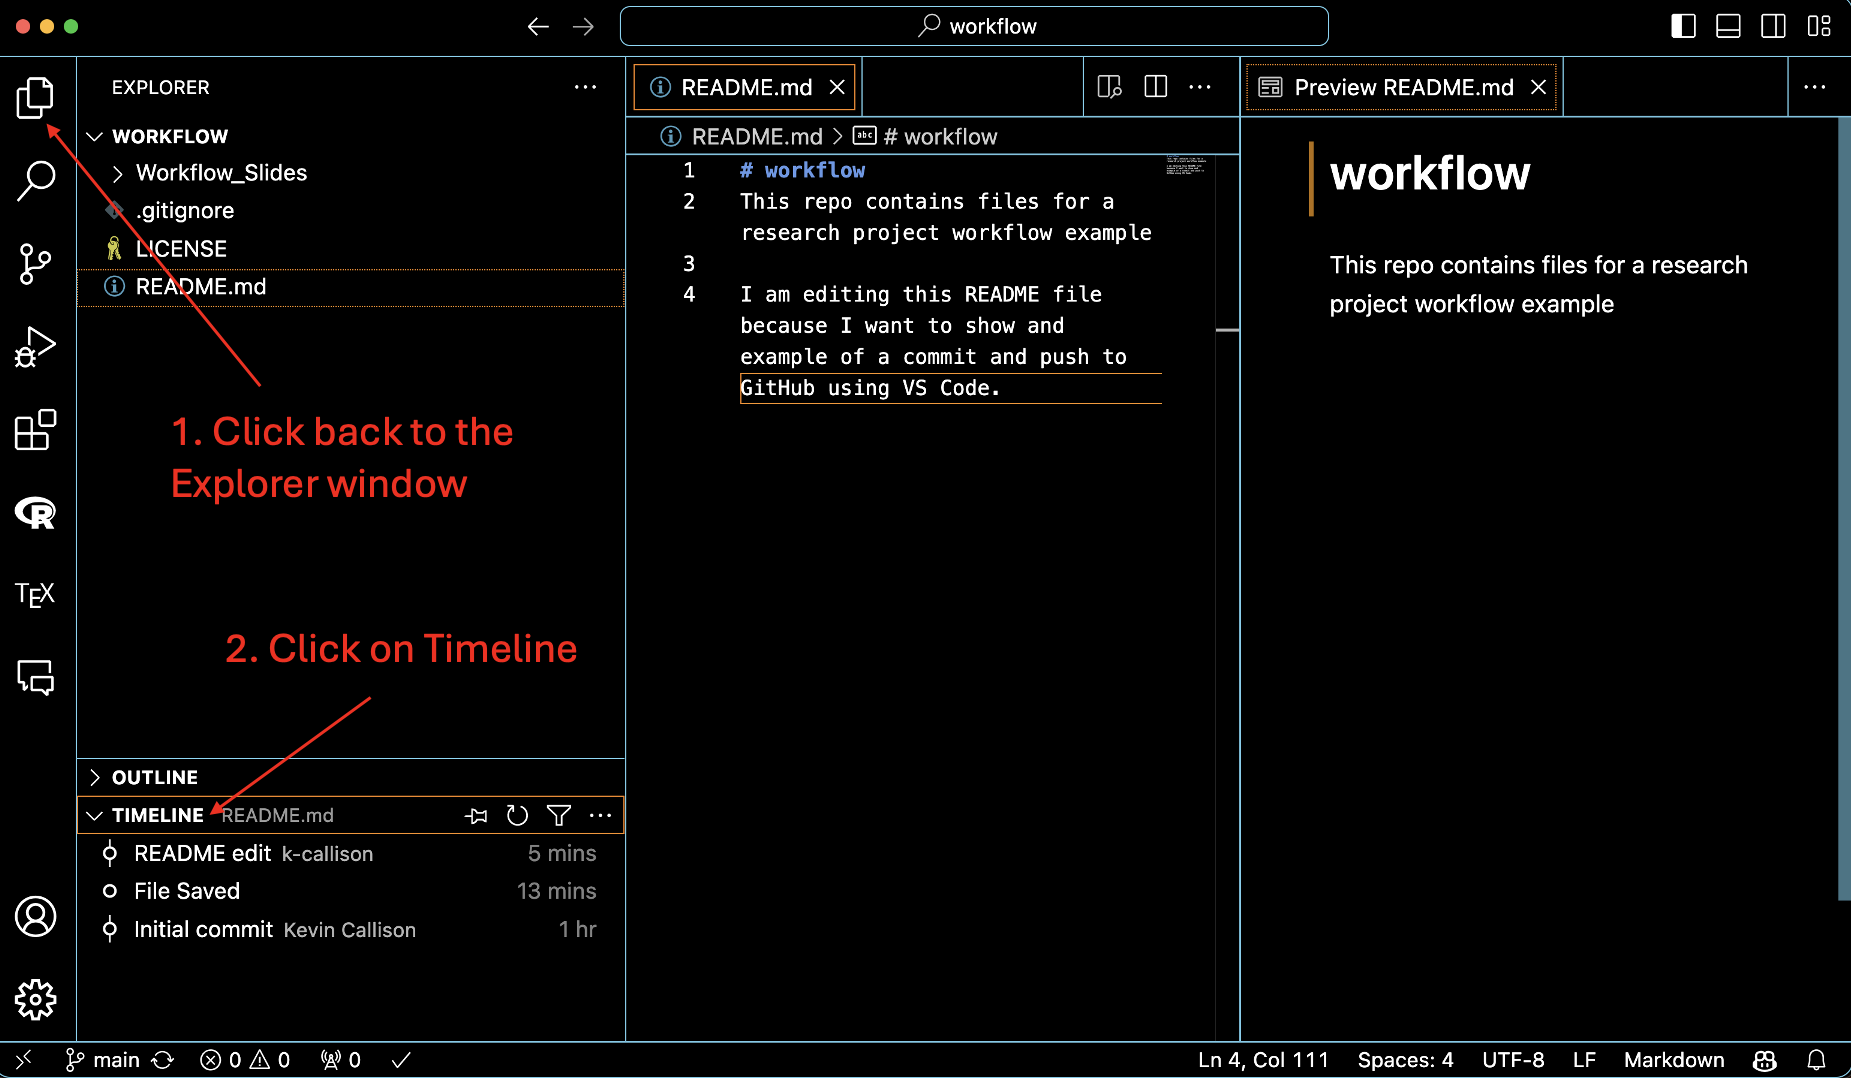
Select a commit to review and you will see the changes highlighted in the Edit Window.
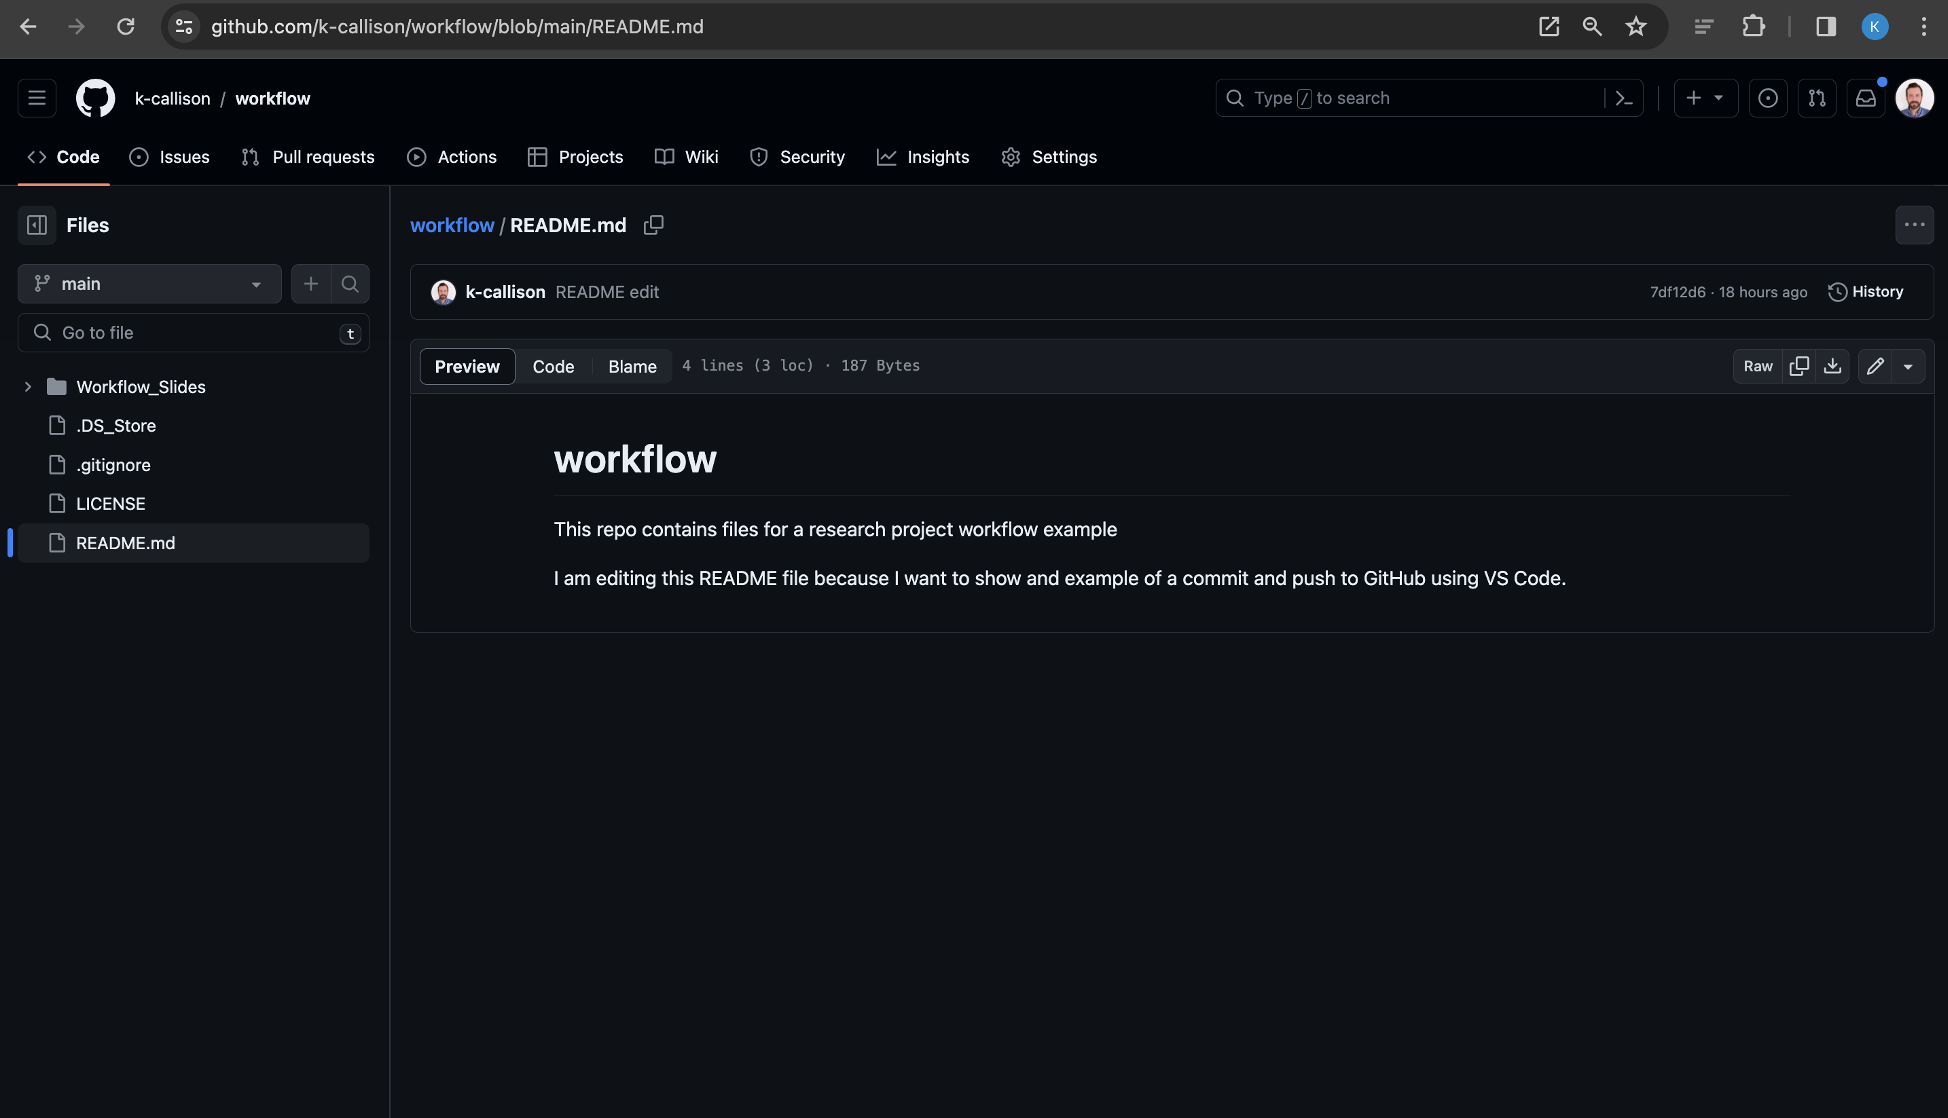
Finally, refresh your GitHub repo, open the edited file, and you should see the changes that you just made.